Audio Recording with QuickTime
Recording with QuickTime (macOS)
Advantage: If you do not have a fast internet connection at home or do not need a screen recording, it makes sense to create an audio-only recording for your students and refer to a PowerPoint presentation as a PDF, for example. The resulting files are much smaller than video files, which means the upload to Lecture2Go takes less time and can be done directly on the Learning Management System
- Here you can find an English PDF version of the manual: Audio Recording with QuickTime (MacOS)
1. Required Equipment
2. Installation
3. Recording
4. Editing the Recording
5. Converting the Recording to an mp3 File
6. Publishing the Recording
7. Further Information
1. Required Equipment
- a microphone
- A quiet room: Especially for a voice-only recording, it is important that there are no background noises that could disturb the recording.
- Internet access (for uploading a voice-only recording, the internet connection does not need to be particularly fast)
- a computer
- You can use the built-in microphone of your computer, but it is not recommended due to poor audio quality.
- You can achieve better sound quality with an external microphone, such as
- a headset
- a stand/desk microphone
2. Installation
- QuickTime and iTunes should be pre-installed on your Mac.
3. Recording
- Open QuickTime.
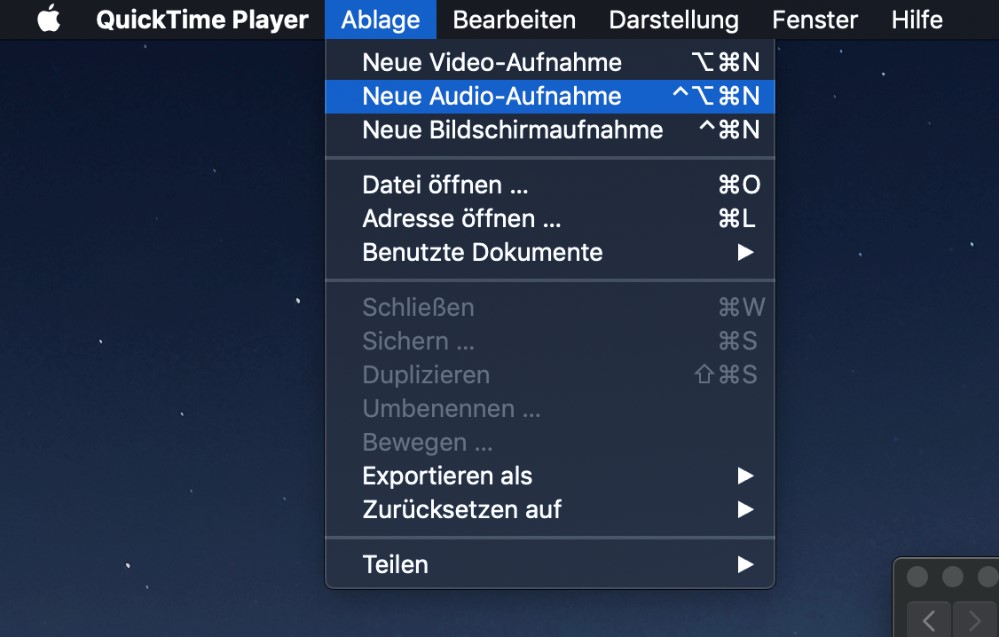
- Click on "File" and then "New Audio Recording".
- The audio recording window will open.
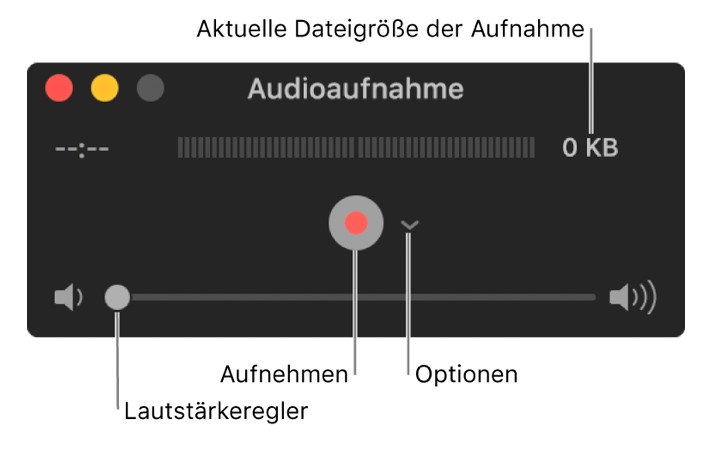
- Under "Options," you can set up the microphone.
- By turning up the volume slider, you can hear yourself during the recording.
- Click the record button to start the recording.
- To pause the recording, hold down the Option/Alt key (⌥) on the keyboard and click the record button (which turns into a pause button).
- Clicking again (without the Option/Alt key) will resume the recording.
- To stop the recording, click the stop button (without the Option/Alt key).
- To save the recording, go to "File" -> "Save…"
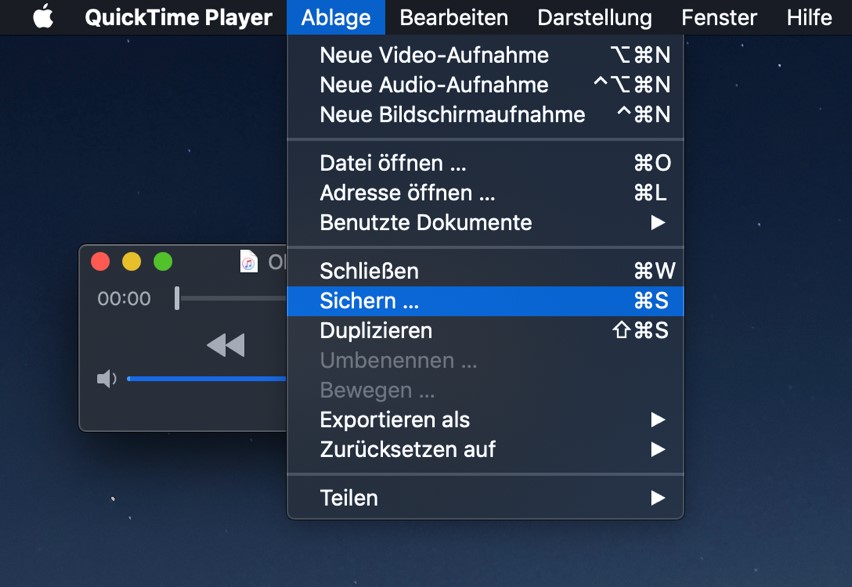 Dort geben Sie einen Namen und Speicherort an.
4. Editing the Recording
If needed, you can trim the recording, i.e., cut off parts at the beginning and/or end.
To do this, click on "Edit" -> "Trim…"
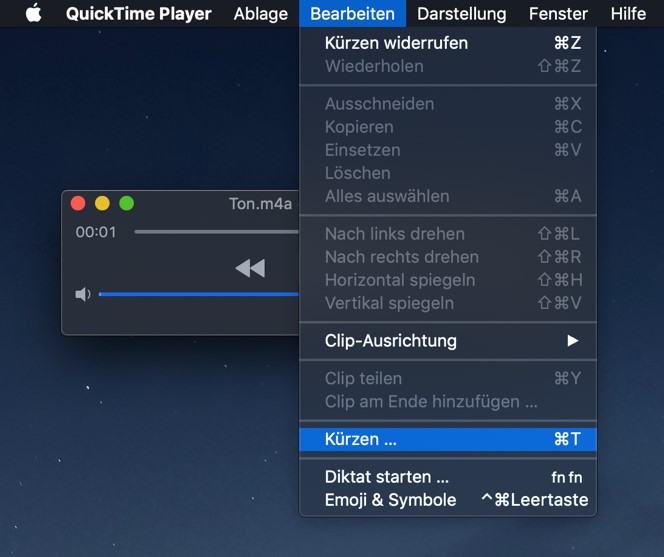
In the following window, you can adjust the yellow bar to the desired length.
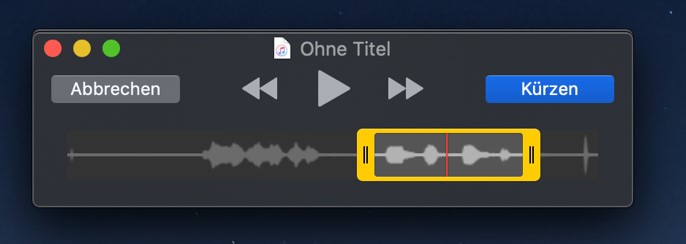
The red line indicates your current position in the recording.
When you click "Trim," the trimmed version will be saved in the original file.
5. Converting the Recording to an mp3 File
QuickTime saves recordings as .m4a files, but Lecture2Go only allows uploads of .mp3 files, so the file needs to be converted.
You can use iTunes for this (also an Apple-owned program):
- Open the recorded file with iTunes.
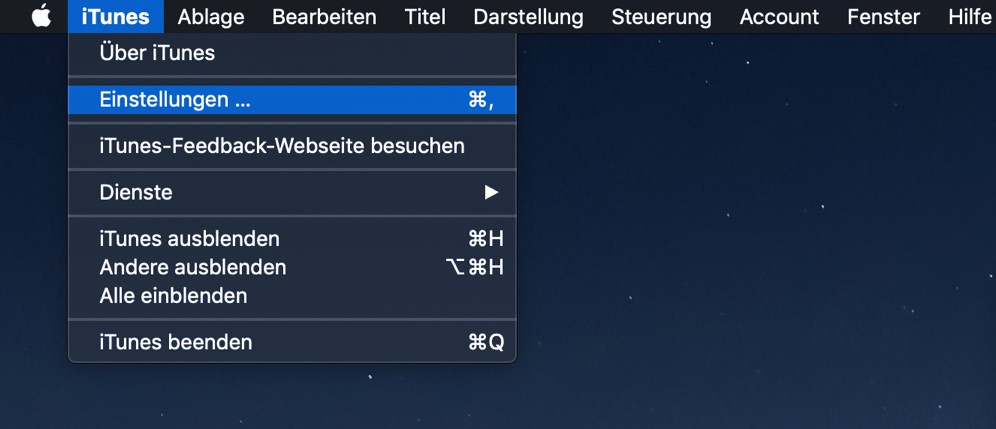
- Open "iTunes" -> "Preferences"
- Under "General" -> "Import Settings," set "Import Using" to "MP3 Encoder" and click "OK" twice.

- Under "File" -> "Convert," you can now create an mp3 version, which will appear in iTunes next to your old file.

- When you drag and drop this new file onto your desktop or into a folder, you will see a file with the .mp3 extension there.
- You can upload this file to Lecture2Go.
6. Publishing the Recording
- The Lecture2Go Platform of the University of Hamburg
- Here you will find instructions on how to upload your file online.
7. Further Information
- Version: Tested with QuickTime Version 10.5
- Provider's Help Pages
