Pre-recording a Lecture with OBS Studio
- Here you can find an english PDF-version of the manual: Lecture recording with OBS Studio
-
Required Equipment
-
Installation
-
Auto-configuration Wizard
-
Adding System Audio to OBS (Mac Users Only)
-
Setting Up Recording Sources
-
Configuring Video Output and Defining Shortcuts
-
Recording
-
Tips for Better Audio Quality
-
Publishing the Video on Lecture2Go
-
Further Information
1. Required Equipment
- A computer
- A microphone
- You can use the built-in microphone of your computer, but this is not recommended due to poor audio quality.
- You will achieve better sound quality with an external microphone, for example:
- in a headset,
- a stand/desktop microphone
- Optionally, a webcam if you want to appear in the video yourself
2. Installation
Download the program from https://obsproject.com
- Choose between Windows, macOS, and Linux
- Follow the installation instructions
- Alternatively, for computers under RRZ administration: Obtain the software from the RRZ service portal.
- Open OBS
3. Auto-configuration Wizard
Upon the first launch of OBS, the Auto-configuration Wizard helps you set the optimal settings. The wizard can also be opened later via the "Tools" tab.
Select "Optimize for recording, streaming is secondary."
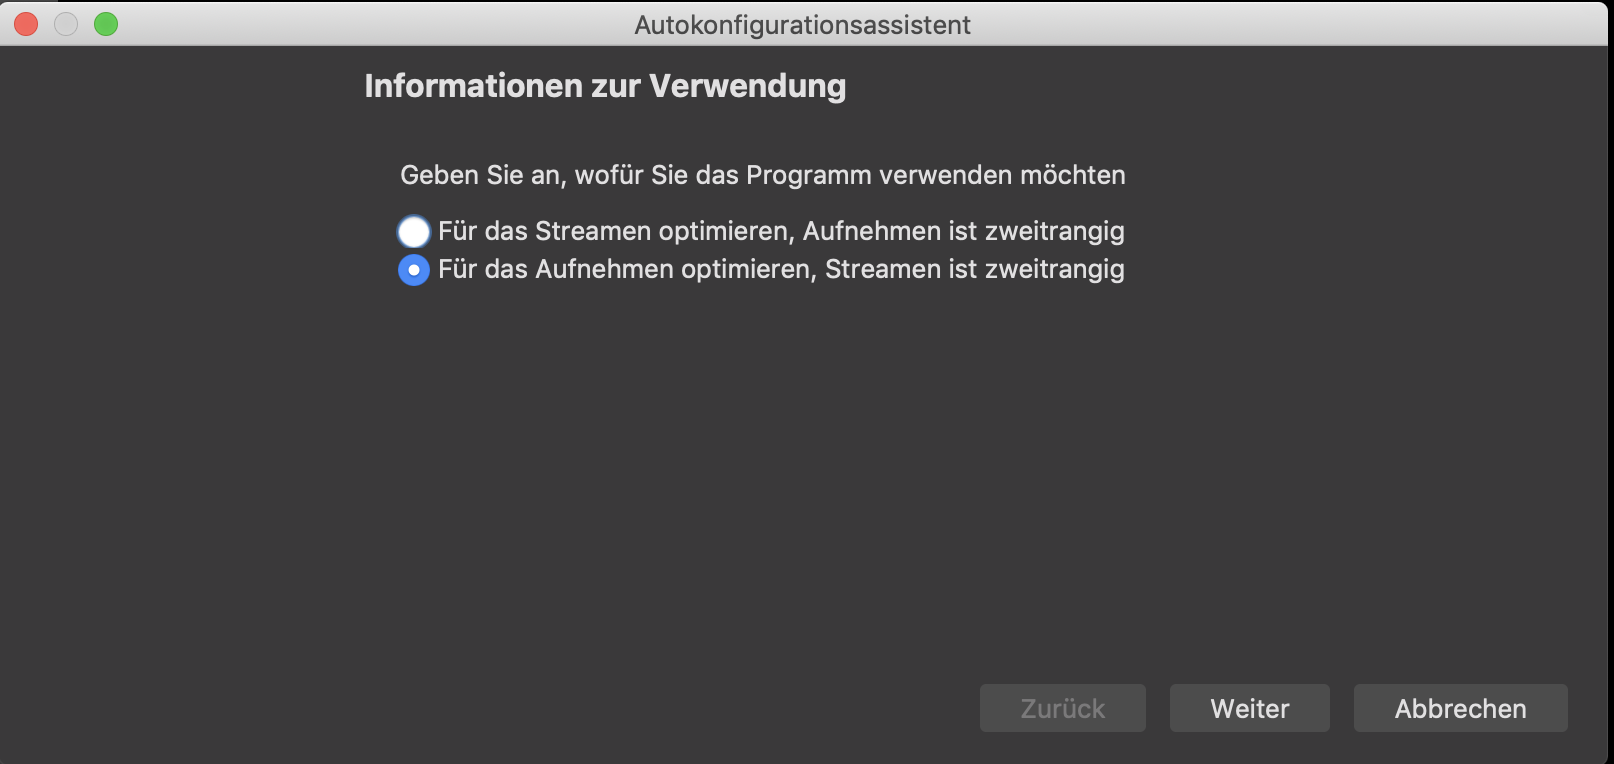
Then select the resolution 1280x720 and 30fps.

Now the wizard analyzes the best configuration for your system.
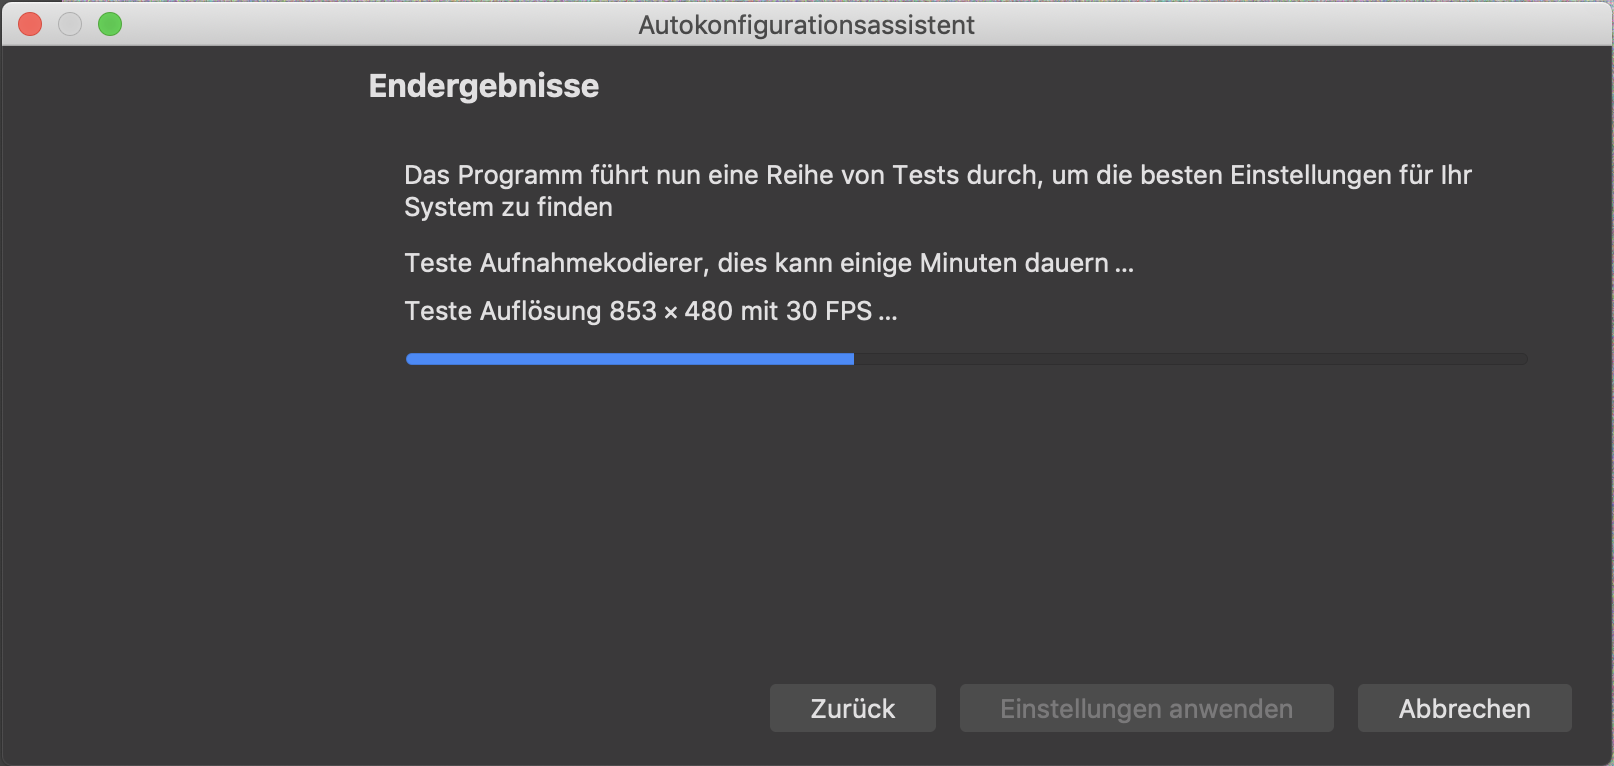
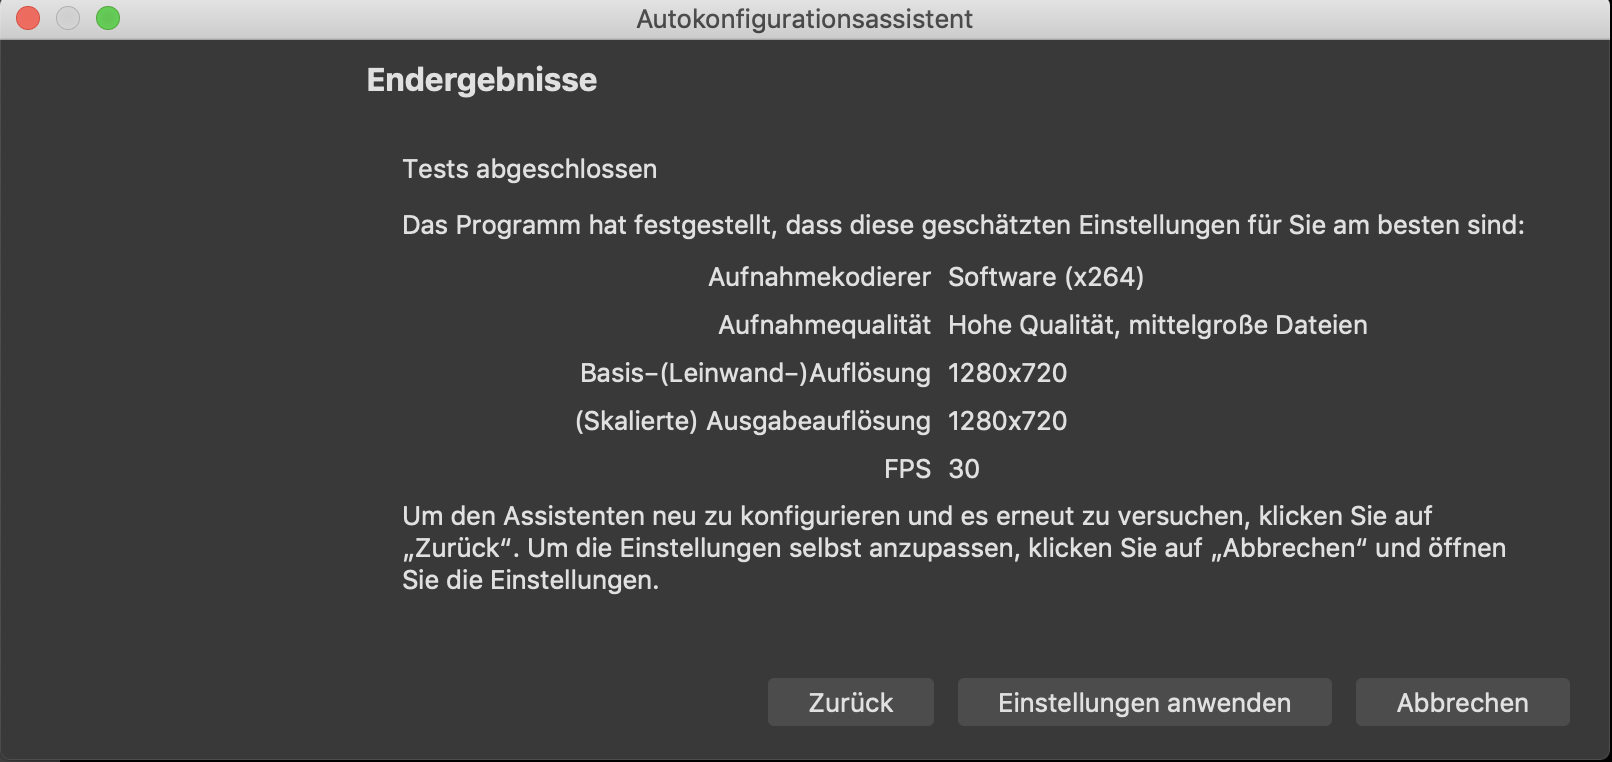
After the analysis, you have the opportunity to review and apply the settings.
4. Adding System Audio to OBS (Mac Users Only)
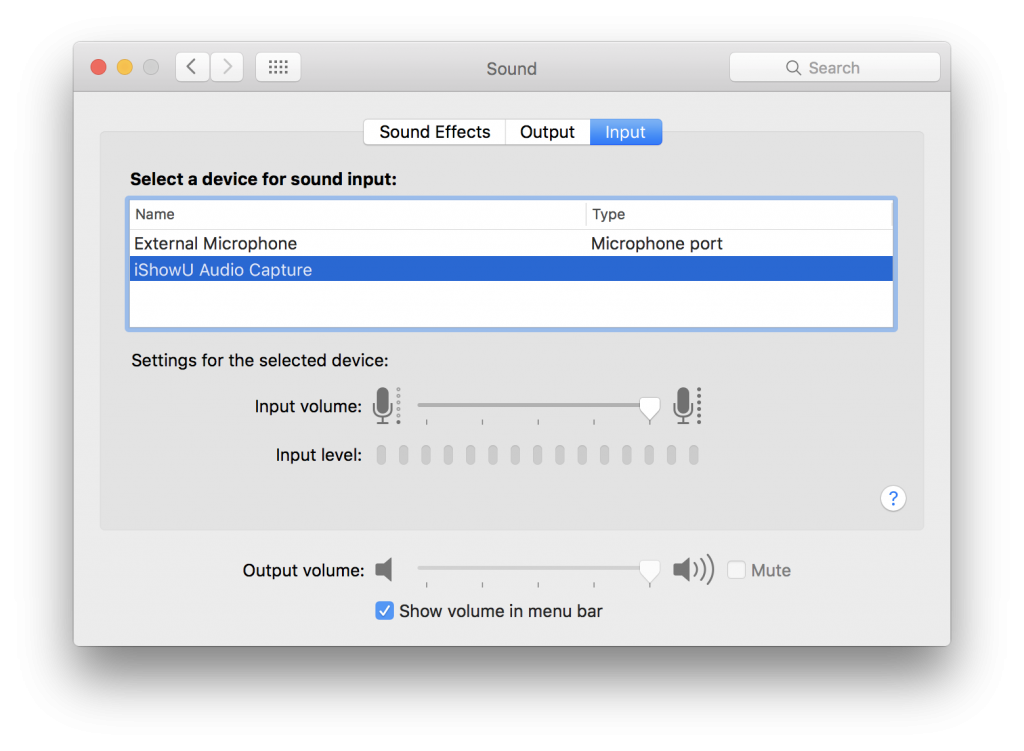
To enable OBS to "hear" what you can hear on Apple computers, you need to use the free tool IShowU Audio Capture.
- Download the program here
- Follow the installation instructions
- Then open your sound settings (System Preferences > Sound) and select IShowU Audio Capture as the sound input.
Start the Audio MIDI Setup app (Applications > Utilities).
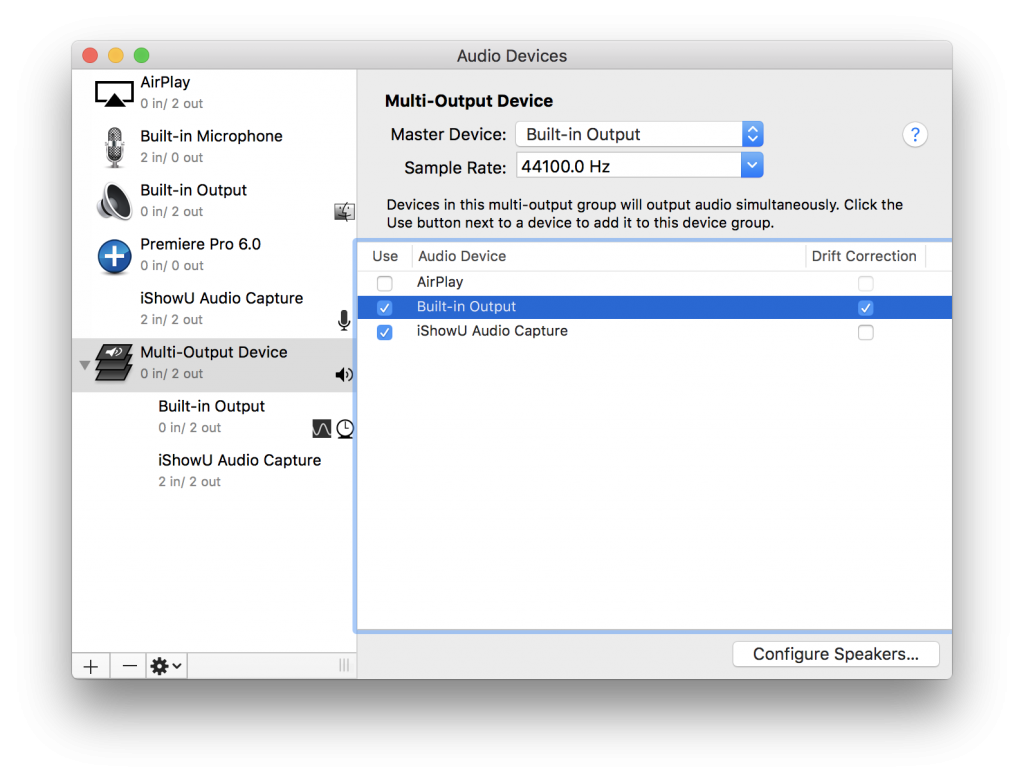
Here you create a new Multi-Output Device so that the system audio can be output simultaneously to your speakers/headphones and OBS.
Click on the 'plus sign' in the lower left corner and select 'Create Multi-Output Device'. In the right section, check both Output (built-in) and IShowU Audio Capture. Enable Drift Correction for Output (built-in).
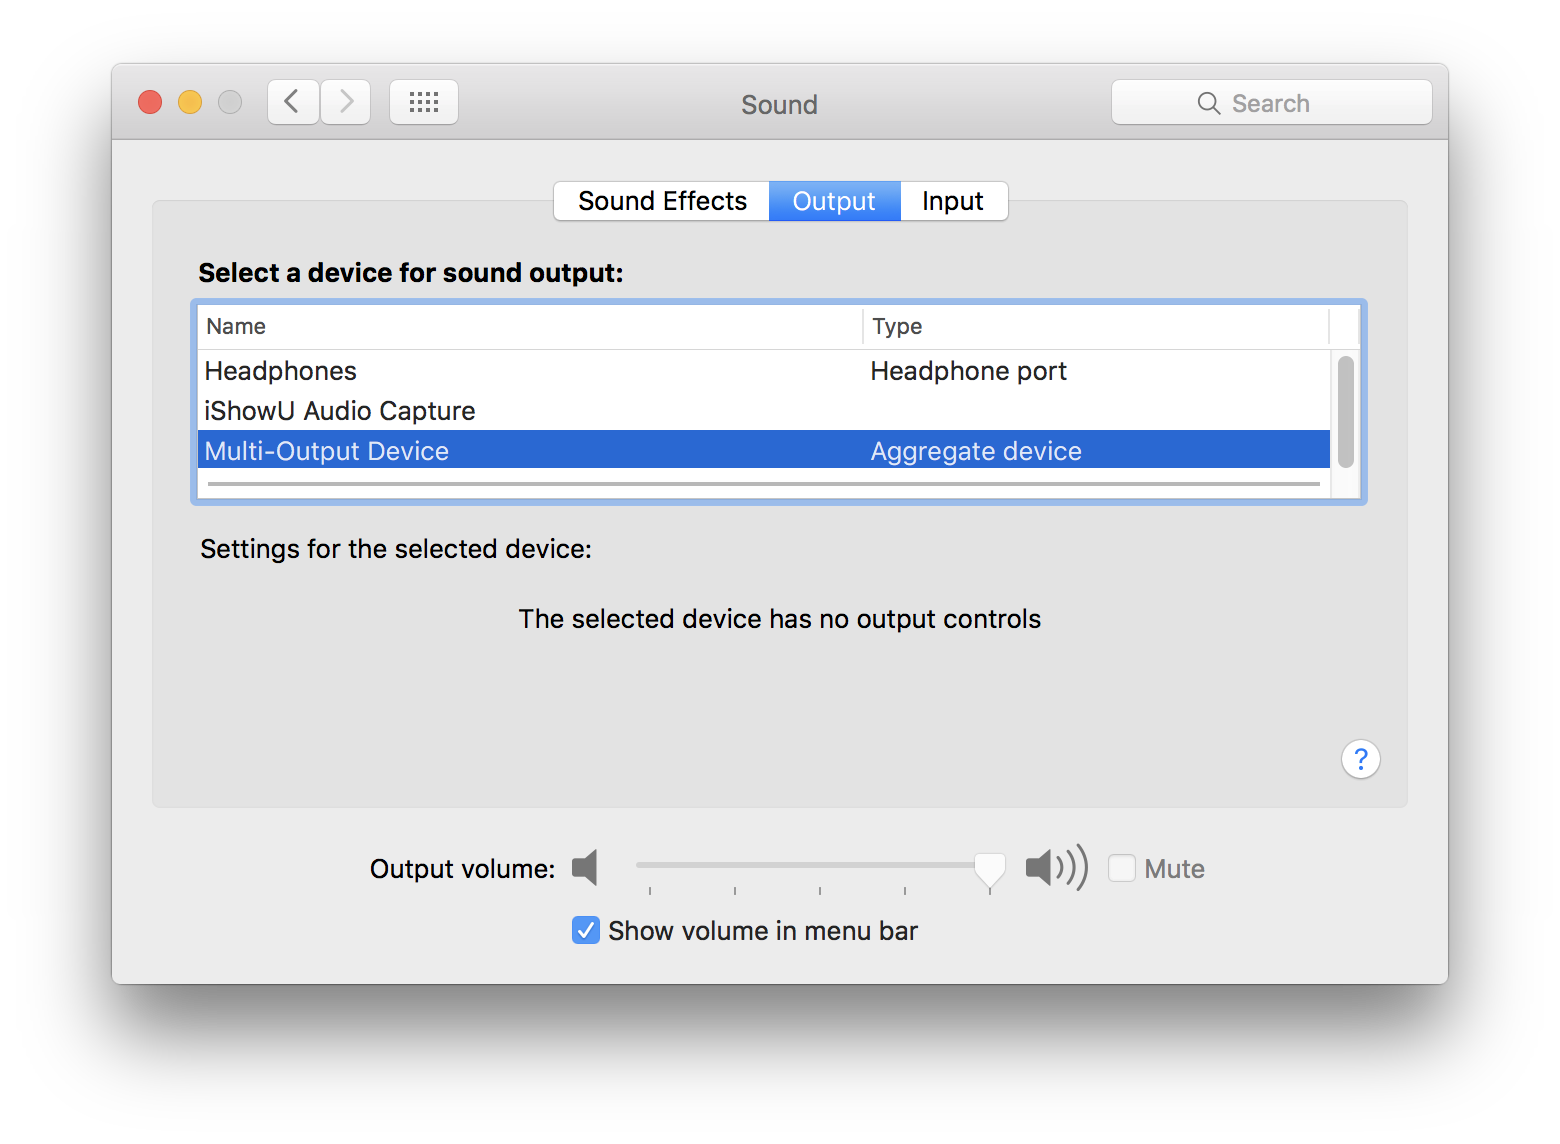
Go back to System Preferences > Sound. Here you will find the Multi-Output Device. Before selecting the Multi-Output Device, you should briefly adjust your volume, as the volume cannot be increased or decreased from Multi-Output Devices.
Now select the Multi-Output Device and close the window.
5. Setting up the recording sources
At the beginning, you will see a black screen (see Fig. 1:)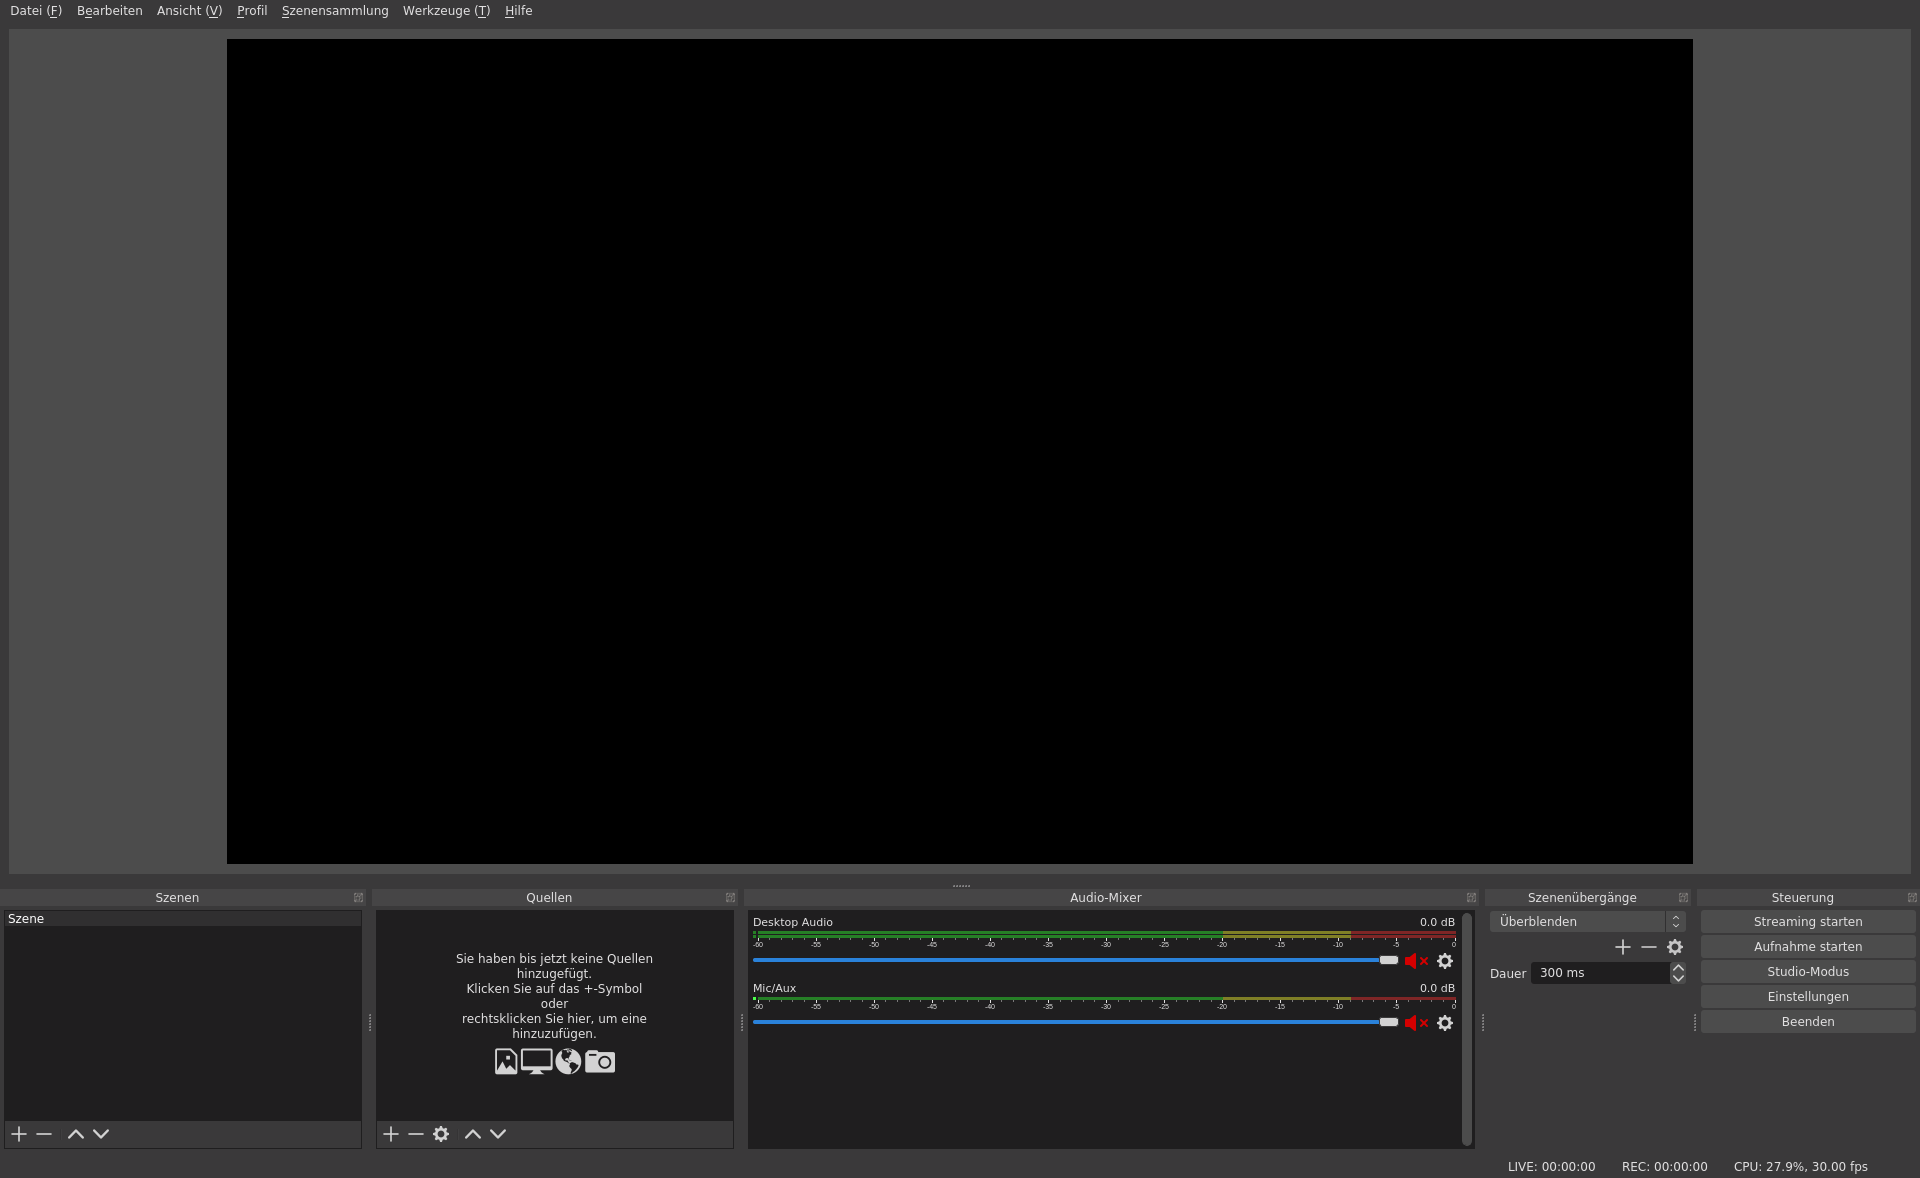 Fig. 1 The start screen of OBS Studio
- First, create a scene. A scene is a template with sources that you have predefined.
- By default, a scene titled 'Scene' is already created, although it doesn't have any sources yet.
- You can assign multiple sources to a scene. For example, you can record the webcam in addition to the screen. Possible sources include:
- Audio Sources
- Audio Input Capture, e.g., a connected microphone
- Audio Output Capture, e.g., the output (e.g., Desktop Audio)
- Screen Capture
- Window Capture
- Only the window defined in the source is captured, even if it's minimized
- Video Capture Device
- Recording via integrated webcam or external camera
- Audio Sources
- At the bottom center of the screen, you will see the Audio Mixer. Click the speaker icon to mute all audio sources except the desired one.
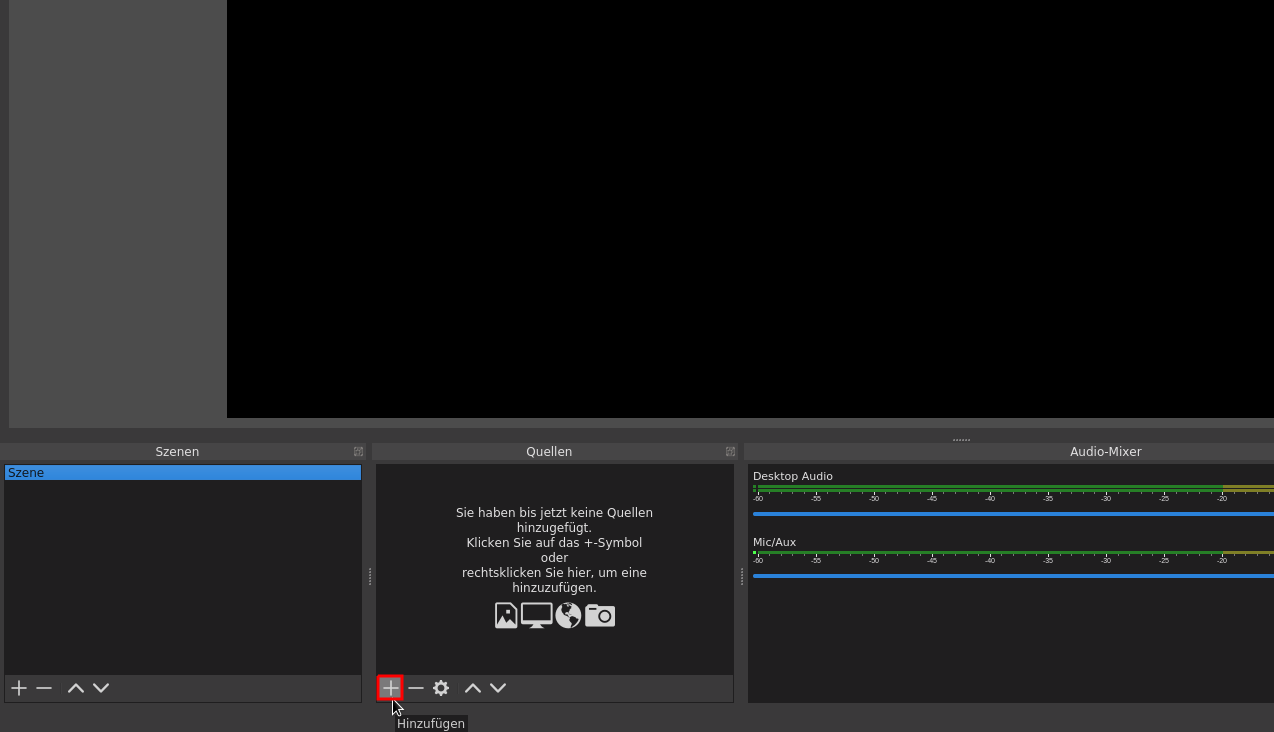 Fig. 2 Add Source
- Click on the '+' symbol next to Sources (see Figure obs-source-add) to add sources to the default scene.
- To record the screen, select 'Display Capture' from the menu that opens.
- Click 'OK'.
- Under 'Display', select the screen you want to record.
- Click 'OK'.
- To record an already open window, click 'Window Capture'.
- Click 'OK'.
- Under 'Window', choose the window you want to record, e.g., your presentation slides.
- Click 'OK'.
- If you want to record yourself with a camera, select 'Video Capture Device' as another source (again via the '+' symbol).
- Click 'OK'.
- Under 'Device', select either the integrated webcam or an externally connected camera.
- Click 'OK'.
- If you have multiple video sources, you can resize the windows by clicking on a video window. A red border will appear. By clicking on the border and holding the mouse button, you can change the size of the window (see Fig. obs-window-size-change).
With the arrow buttons in the 'Sources' box, you can move the windows further to the foreground or background. The top window in the list is at the very front, and the subsequent windows are displayed in order behind it.
- To record the screen, select 'Display Capture' from the menu that opens.
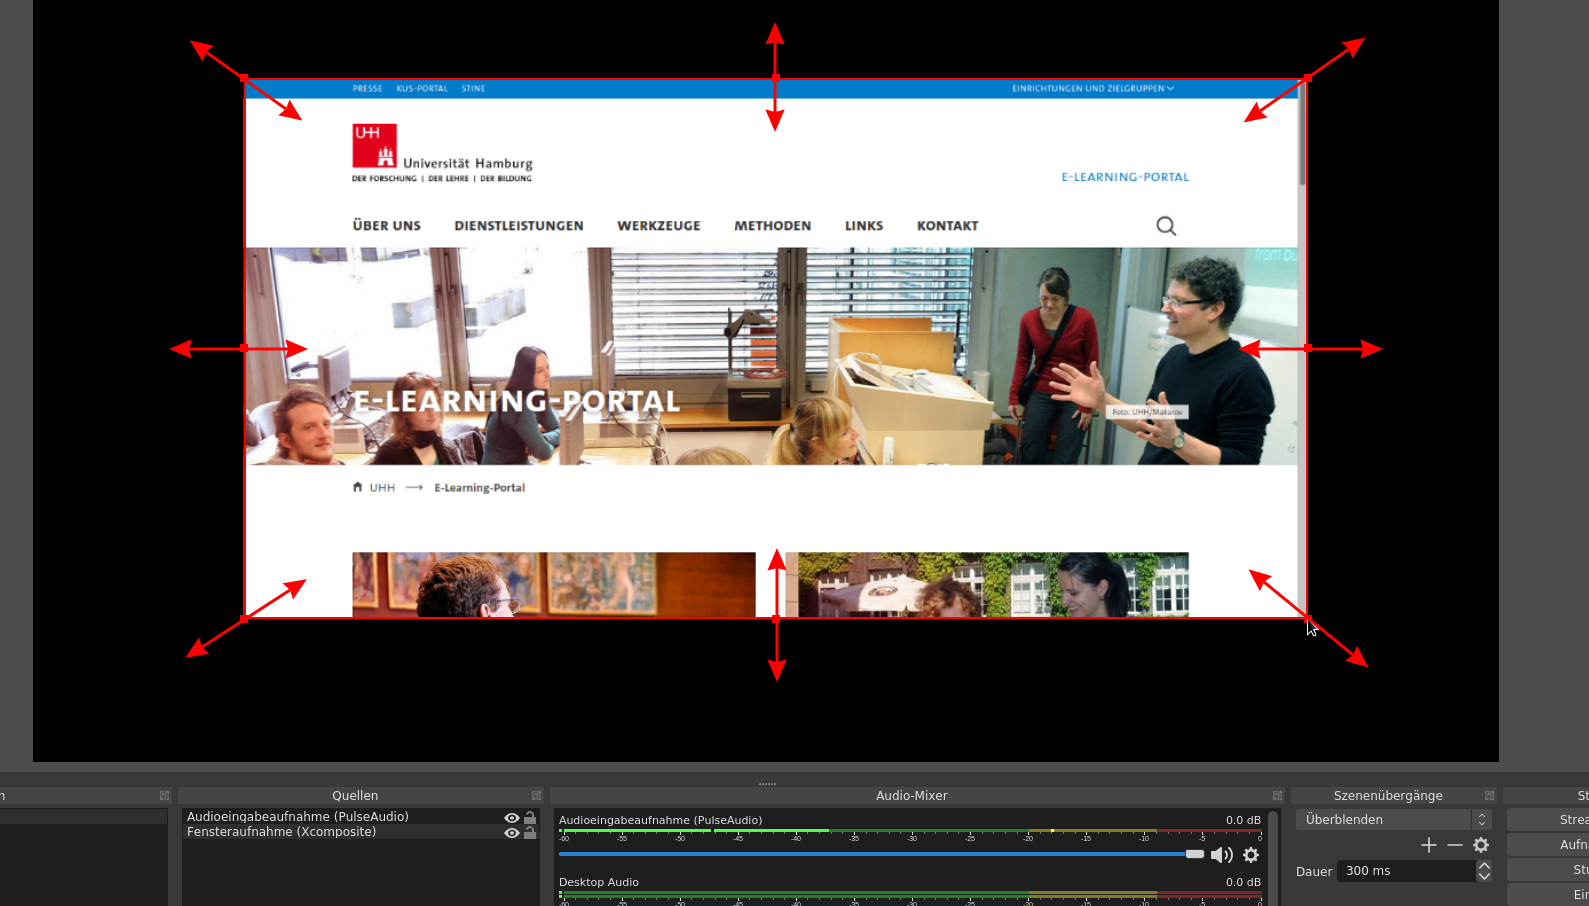 Fig. 3 Change Window Size
- The connected microphone should be automatically recognized by OBS.
- If not,
- Select 'Audio Input Capture' as another source via the '+' symbol.
- Click 'OK'.
- In the configuration window that opens, select your desired microphone as the source under 'Add Existing'.
- Click 'OK'.
- Your audio source should now be displayed in the Audio Mixer.
- When speaking clearly, the level indicator should be in the yellow range.
- You can adjust the level using the slider in the level display.
- If not,
6. Configuration of video output and definition of keyboard shortcuts
- Publishing the video on the Lecture2Go platform of the University of Hamburg. Go to 'Settings' in the 'Control' box at the bottom right and select the following configuration:
- Under 'Output'
- Choose the directory for 'Recording Path' where you want to save your recordings.
- Under 'Recording'
- Select 'mp4' as the 'Recording Format'.
- You can keep the default settings for the rest of the options.
- Under 'Hotkeys', you can define useful shortcuts, including 'Start Recording', 'Pause/Resume Recording', and 'Stop Recording'.
- It's useful to define a hotkey/shortcut for pausing/resuming the recording.
- Click 'OK'.
- Under 'Output'
7. Recording
- To start the recording, click 'Start Recording' in the 'Control' box at the bottom right of the window.
- It's best to test the recording first, especially the sound quality/volume.
- If you want to stop the recording, click 'Stop Recording' in the 'Control' window.
- Now open your recorded screencast in the selected directory. By default, it is named with the current date and time of the start of the recording.
- If the sound is too quiet, adjust the volume of the recording under 'Mixer' at the bottom center of the screen. If it is already at 100%, click on the gear icon to the right of the audio channel, select 'Advanced Audio Properties', and adjust the volume of the audio input device to a value above 100%.
- If the sound is noisy, please follow the 'Tips for better audio quality' below.
- Test again.
- If you are satisfied with the result, record your lecture/contribution.
8. Tips for Better Audio Quality
Noise Suppression
- Go to the audio source of your scene and right-click with the mouse.
- Select 'Filters' from the menu, which will open a new window.
- Click on the '+' symbol and choose 'Noise Suppression' from the menu.
- Click 'OK'.
- Set the 'Suppression Level' to -17 dB.
- Click on the '+' symbol and choose 'Noise Gate' from the menu.
- Set the 'Close Threshold' to -44.
- Set the 'Open Threshold' to -42.
- Click 'Close'.
Microphone
- The microphone should be placed close to your mouth.
- It is best to use a wired headset for audio transmission, not Bluetooth.
Environment
- Record in a room with little echo; shelves or curtains and blankets on the wall can reduce the echo effect.
9. Publishing the video on Lecture2Go
Here you will find a guide, on how to upload your video file online.
10. Further Information
- The colleagues from the MIN Faculty have also created a guide for recording lectures in OBS Studio. There you will find some useful tips for a successful recording and a ready-made configuration file for recording presentations with audio in OBS.
- Manufacturer's help pages
- Tested for OBS Studio version 24.0.3"
