How do I record a presentation in Office 2019 auf?
- Hier finden Sie die Hilfeseite des Herstellers
- Here you can find an english PDF-version of the manual: Lecture recording with Office 2019
Die Aufzeichnung einer Präsentation funktioniert folgendermaßen:
Im Reiter "Bildschirmpräsentation" auf den Pfeil im unteren Bereich in der Schaltfläche "Bildschirmpräsentation aufzeichnen" klicken.

This opens the presentation and recording view:

- In the top left corner, you can start, pause, and stop the presentation recording.
- In the top right corner, you will find the "Clear" and "Settings" menu options.
- Using "Clear," you can delete recordings on individual or all slides, as well as any drawings or laser pointer movements.
- In the bottom right corner, you can see a preview of your camera. You can disable the camera and microphone using the respective icons.
- Under "Settings," you can select which camera and microphone should be recorded:

In addition to various pens and markers, the mouse can also be used as a laser pointer, whose movements will also be recorded. To do this, right-click and select the "Laser Pointer" option under "Pointer Options":

When you finish your presentation, the recording will automatically stop and be saved in the PowerPoint file. This can also be played back:

Export Video
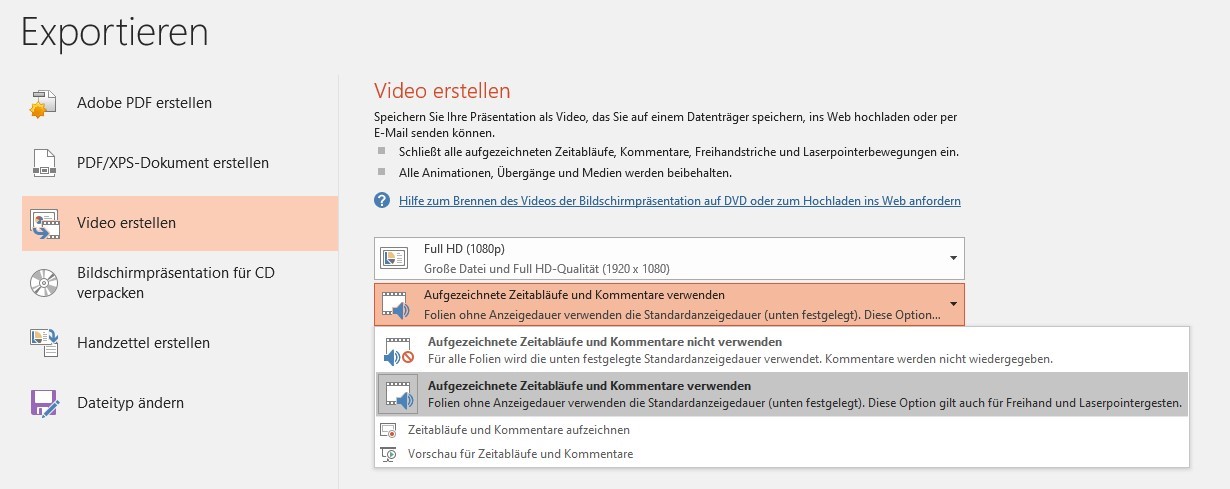
To export the recording as a video file, go to the "File" tab in the top left corner and select the "Export" submenu. Here, choose the "Create a Video" option:

Here, you can select the video resolution before exporting and decide whether recordings and comments (markers, pens, laser pointers) should be exported (default: "Use Recorded Timings and Narrations"). At standard quality, the used storage space is up to 4 MB per minute.
Please select MPEG4-Video as the file type.


