Structure Room Contents
In this tutorial, five different ways to clearly structure room contents are presented.
- The simplest way of structuring is through assigned entries, which are located under a material entry. Simply assign all entries that are related in content to each other.
- Sections are very popular among users and can be used to subdivide material entries. Existing material entries can be further structured with sections. An automatic table of contents will be created, and there is the possibility to attach files to each individual section.
- In CommSy, you also have the option to structure or link content by summarizing them into categories or assigning them keywords, which will appear next to the respective entry page as well as on the room's homepage.
| Note: As a room moderator, you can activate categories and keywords in the settings under "Miscellaneous." Activated structuring aids will then be displayed on the right side in all categories ("Materials," "Discussions," etc.). Further options for customizing these structuring aids will be explained in the corresponding chapters of this tutorial. |
1. Assigned Entries
As the first form of structuring, the so-called "assigned entries" are available to you. This allows you to network various content-related entries within a project or group room across all categories. The entries connected to the currently opened entry will be displayed under "Assigned Entries" within the entry itself (Fig. 1).
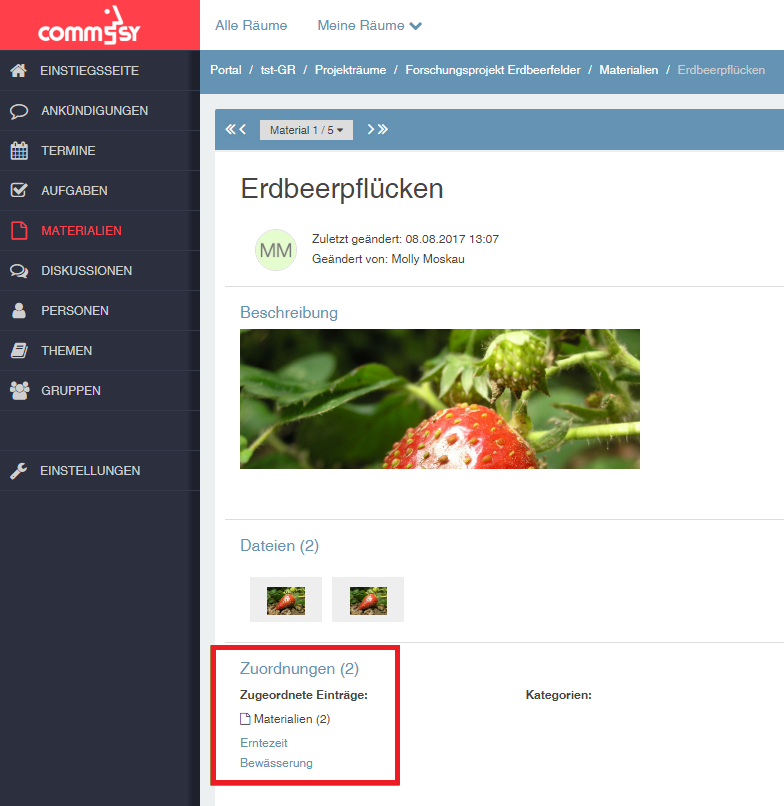
You can connect an entry with other entries by following these steps:
1. Create a new entry or open an existing entry from any category.
2. Move your mouse over the "Assignments" area further down in the entry; the edit icon will appear on the right, which you can click.
3. Stay in the "Assigned Entries" tab and use the search field or the "Recently Edited" menu to select the entries from the room that you want to assign.
4. Save the assignments.
From now on, these assignments will appear under each of the now connected entries. To see which entries are connected and quickly jump to an entry via the automatically generated links, you may need to expand the "Assignments" area on the right using the arrow icon.
| Note: This form of assignment always refers to a specific content entry; therefore, this view will only appear when you open one of the connected entries. |
2. Sections in Material Entries
If you use the materials category to make your files and content available in the room, you can use the section feature to logically and easily subdivide the material entries.
You can add as many sections as you wish to structure a material entry. An automatic directory will be created that lists the various sections and allows you to jump to each section by clicking on the link in the directory. You can change the order afterward. Each section also indicates when it was last edited.
| Note: Sections can be edited individually, and you can upload files in each section! |
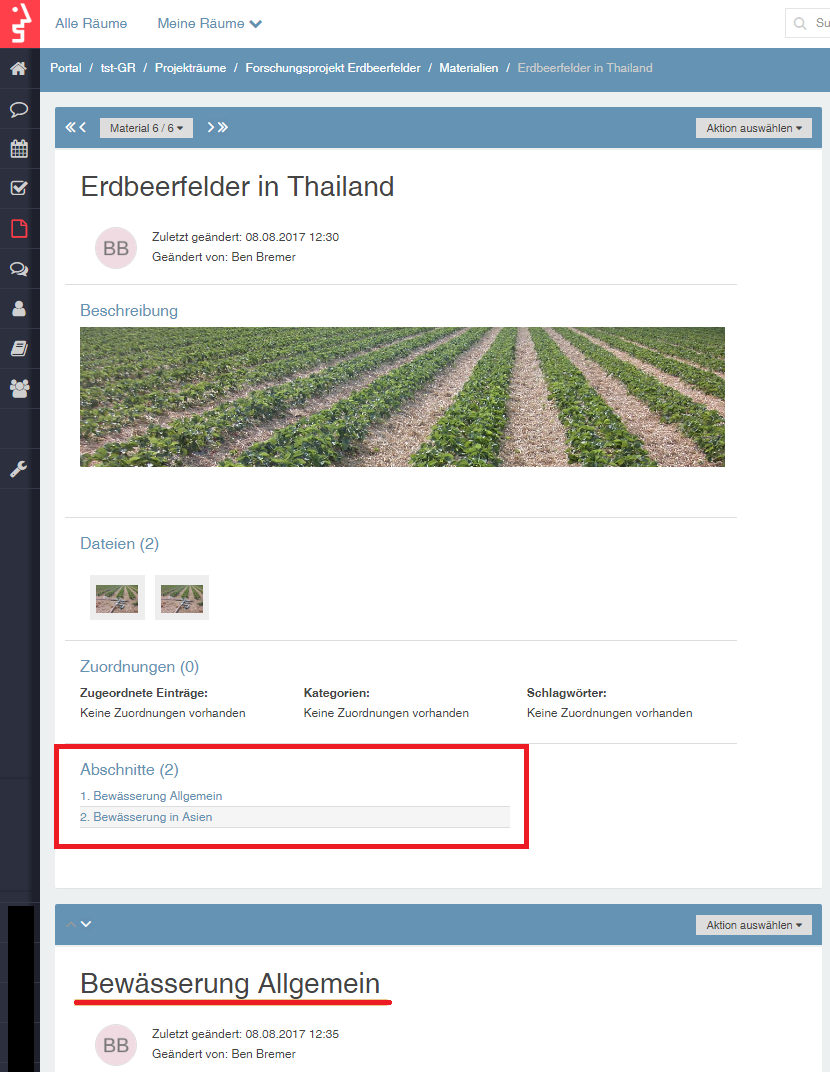
Sections can only be created within an existing material entry. You can learn how to create a material entry in our tutorial.
Open the material entry to which you want to add a section. In the action menu at the top right, you will find the action "New Section."
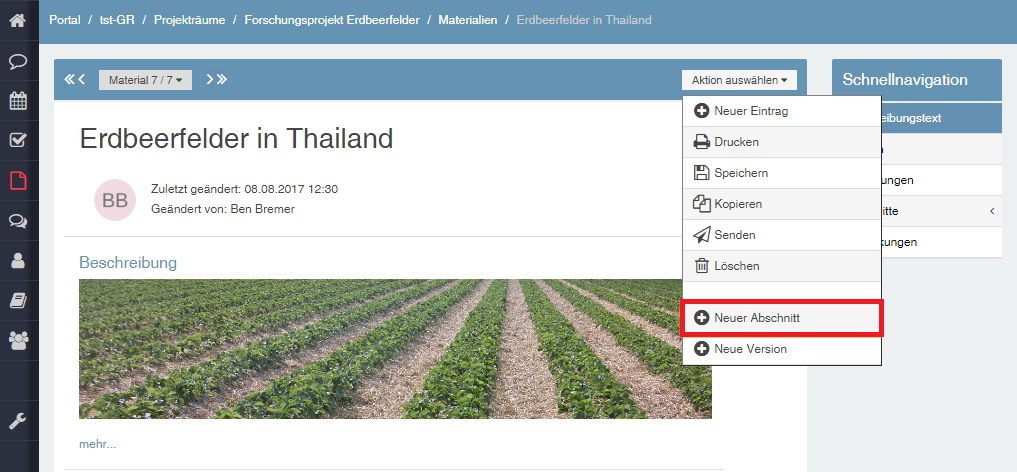
Here you can give the new section a title, which will appear later in the section directory. The numbering and creation of the directory occur automatically. You can enter text in the "Description" area, which will appear under the section, or attach files—similar to new material entries. However, sections cannot be hidden or made read-only independently of the material entry.

A new section will always be placed at the end when other sections are already present. However, you can change the position of the sections afterward by using drag & drop, clicking on the edit icon to the right of the "Sections" area.
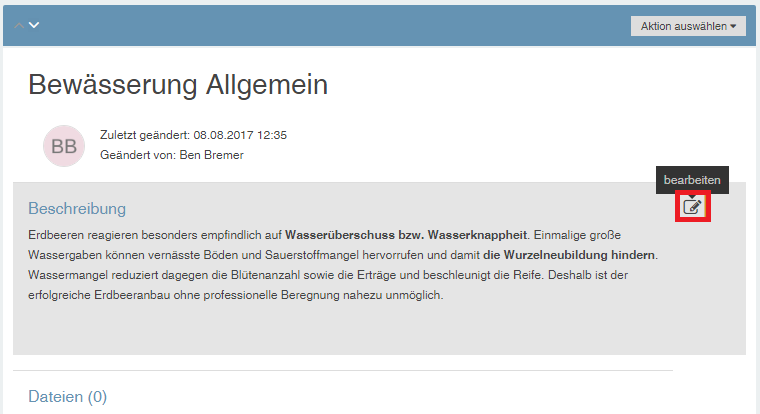
To edit an already created section, scroll to the title of the section you wish to edit. Click on the edit icon next to the title, description, or file area of the section. After each edit, you must save the changes.
| Note: Sections are suitable, for example, if you want to use only a single material entry for all the provided seminar literature—simply add a new section for each session that contains the relevant files. Alternatively, sections could be used if students are supposed to work on content without creating a material entry for each individual contribution— for example, all room participants could create a personal material entry and then subdivide it with sections as needed. |
3. Keywords
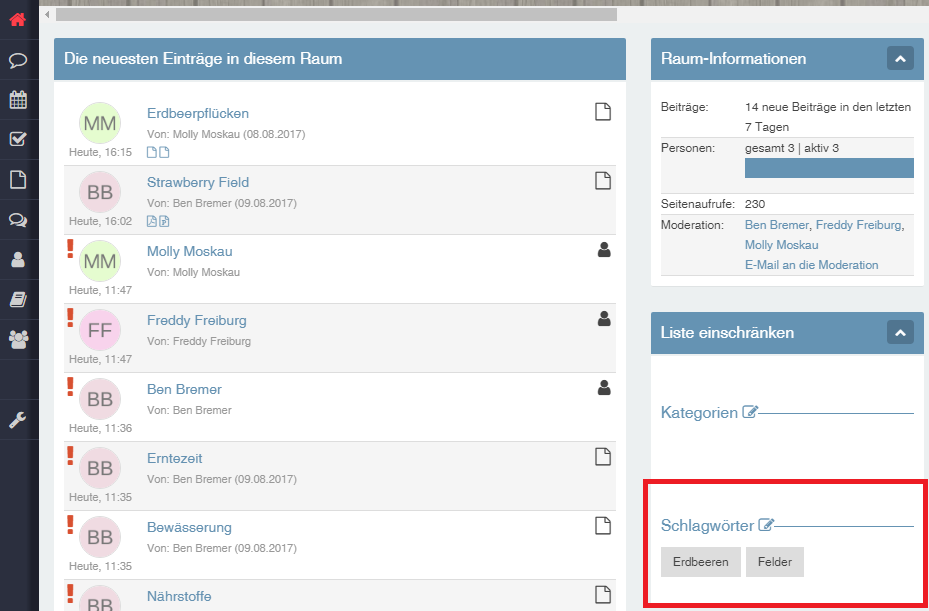
Keywords serve to structure entries in the various categories of a project room. Each entry can be assigned one or more keywords. The keywords used in the room are displayed on the right side in each category (Fig. 6). A hierarchical sorting of keywords is not possible—use the structuring aid "Categories" for this purpose (see Chapter 4).
Keywords act as references: If you click on a keyword, a list of all entries assigned to that keyword will appear.
1. Creating, Editing, and Deleting Keywords
Creating a new keyword: Click on the edit icon in any category of the room on the right side under "Keywords" (Fig. 6). The editing menu for keywords will open (Fig. 7). Here, you can enter a name and save the keyword by clicking "Create New Keyword." Alternatively, you can directly add new keywords within an entry (see below).
Editing keywords: Select it next to the input field on the right. The view of the menu will change (Fig. 8), and you can enter a new name for the keyword, which you confirm by clicking "Update Keyword."
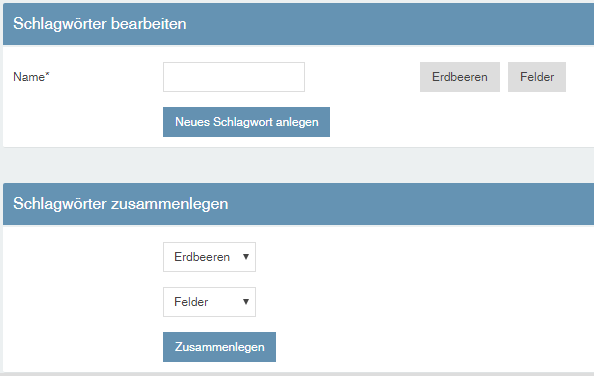
Merging keywords: Select two different keywords from the two dropdown menus. They will be merged; the keyword will initially have both names (separated by a slash). You can change the name in the upper menu if needed. If you want to merge more than two keywords, just repeat this process by merging the newly formed keyword with another one.
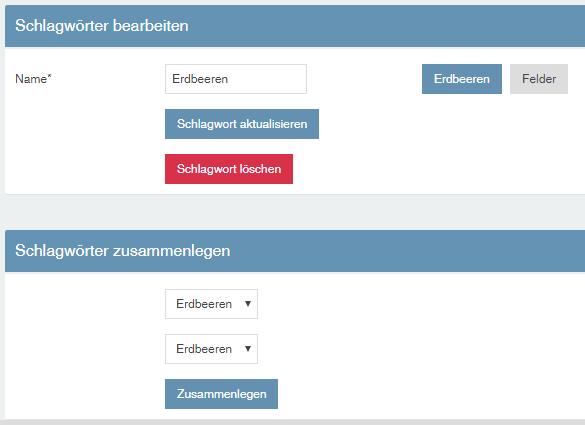
Deleting keywords: Select the keyword to be deleted on the right and click the "Delete Keyword" button. All links to this keyword will be irrevocably lost.
2. Assigning Keywords to Entries
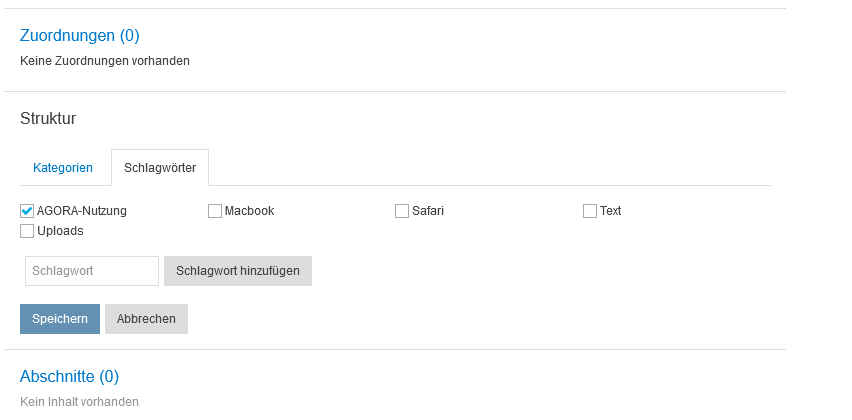
To assign keywords to an entry, open the entry and navigate to the "Structure" area. Click the edit icon next to it and select the second tab "Keywords" (Fig. 9). You can simply select existing keywords by checking the box, then save.
At this point, you can also add new keywords, which will then be incorporated into the room's keyword list. Important: After entering a new name, click "Add Keyword" before saving.
4. Categories
Categories serve to organize and structure the content entries of a room. Unlike keywords, categories can be hierarchically arranged in multiple levels.
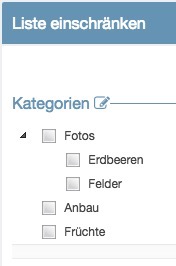
You can create a kind of table of contents for your CommSy room. Categories do not provide information about how often they are assigned. They appear in the info column on the right not as a cloud, but as a tree (Fig. 10).
Like the keyword cloud, the category tree also has a reference function. Clicking on a category within the tree will display a list of all entries assigned to that category.
| Tip: You can make the assignment to categories mandatory for all new entries in the room. This function is useful if you have already pre-structured your room with categories that should be used. This keeps the content very structured and clear. You can activate the mandatory assignment in the room settings. |
Moderators must first activate categories for the room in order to make them usable (Settings ➔ Miscellaneous).
To create and edit categories, proceed as follows:
- Click on the stylized pencil icon next to "Categories" on the right side of the room's homepage (Fig. 10). Various options will be available in the displayed menu (Fig. 11).
- To add a new category, enter the name at the top and click "Create New Category."
- To rename a category, click "Edit" on the right, then enter a different title in the text field at the top of the page. Save by clicking "Update Category." The new name will be automatically updated everywhere.
- To delete a category, click on the red button next to it.
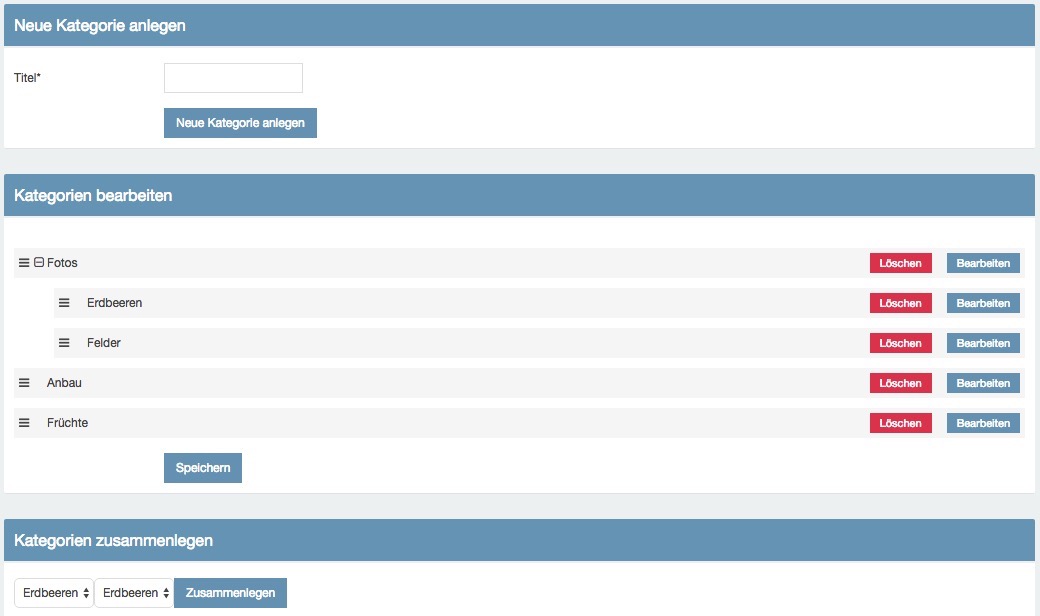
Fig. 11: Edit categories
Ordering & Sorting: You can edit the order of categories via drag & drop. If you want to subordinate one category to another hierarchically, move it slightly to the right and drop it there (see Fig. 12).

Just as you can merge thematically similar keywords, you can also combine two or more categories.
- Select the categories you want to merge from the dropdown menus under "Merge Categories."
- Then click the "Merge" button. The names of the two categories will create a name combination separated by a slash, which you can of course edit.
If you want to add another category to the already merged ones, simply repeat this process.
Assigning Categories: You can assign entries to categories by opening an entry and editing the "Structure" area, where you will also find the categories. Select the second tab "Categories" and check the ones you want to assign to this entry.
