Set Up Material
You can upload materials to CommSy for both personal purposes and within the context of a lecture, seminar, or research group to make it accessible to other users. You can do this:
- in your personal storage, accessible via the CommSy sidebar,
- in a project room you have created,
- in any other project room where you are a participant or moderator.
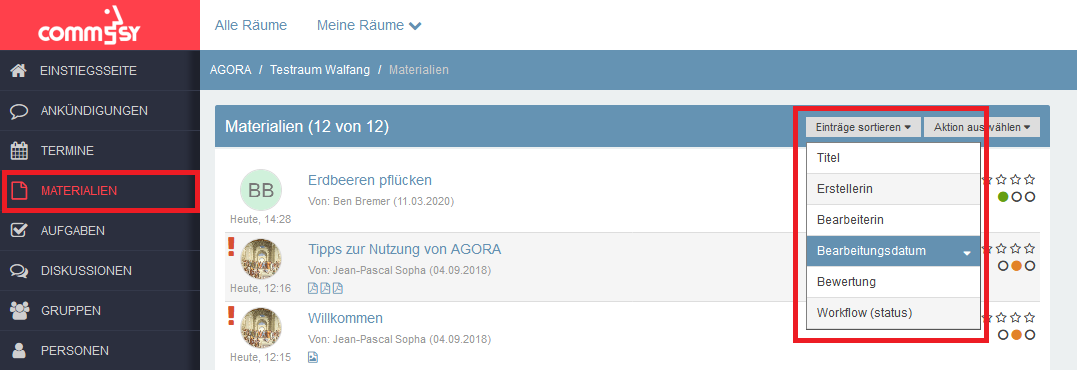
Materials can also be added in various sections. The following procedure will be demonstrated for the "Materials" section, which is specifically dedicated to providing materials, as the name suggests. The procedure is similar in all other sections. Existing materials are displayed as a list in this section (see Fig. 1). By default, the list is sorted by the date of modification. The sorting of the list can be changed by clicking on "Title," "Creator," or "Editor" in the top row, to the left of the action menu.
| Tipp: You can also provide materials within a task entry. The functions are set up similarly to material entries, and additionally, editors and progress can be indicated. Task entries are recommended when texts and other media are not for general information but are intended to be worked on collaboratively. |
| Tip: You can also set materials to be resubmitted on a scheduled basis in order to receive email notifications if desired. This allows you to be reminded of a deadline for a task, such as when texts are provided at the beginning of a seminar and need to be worked on by a certain date. You simply need to enable the "Resubmission" option in the settings. Then, click on the "Edit" icon in the "Workflow" section of a material entry to set up a resubmission. |
1. New Material Entry
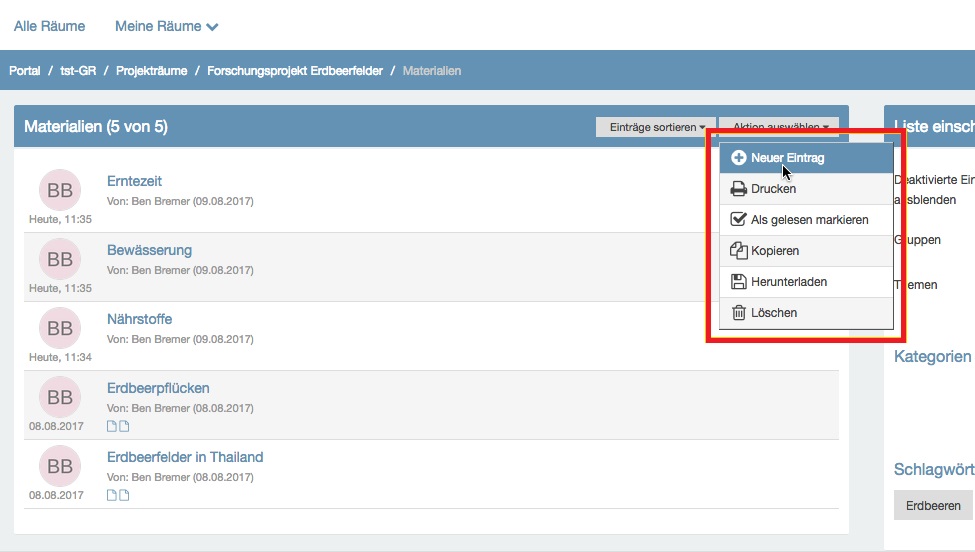
The "New Entry" function, which you can access from the action menu in the upper right corner of the editing line, allows you to create new materials in various formats. You can upload almost any file format to CommSy. The only limitation is the file size, which must not exceed 500 MB per file.
To create a new material entry, click on "New Entry" in the action menu under the "Materials" section. A new page will now open.
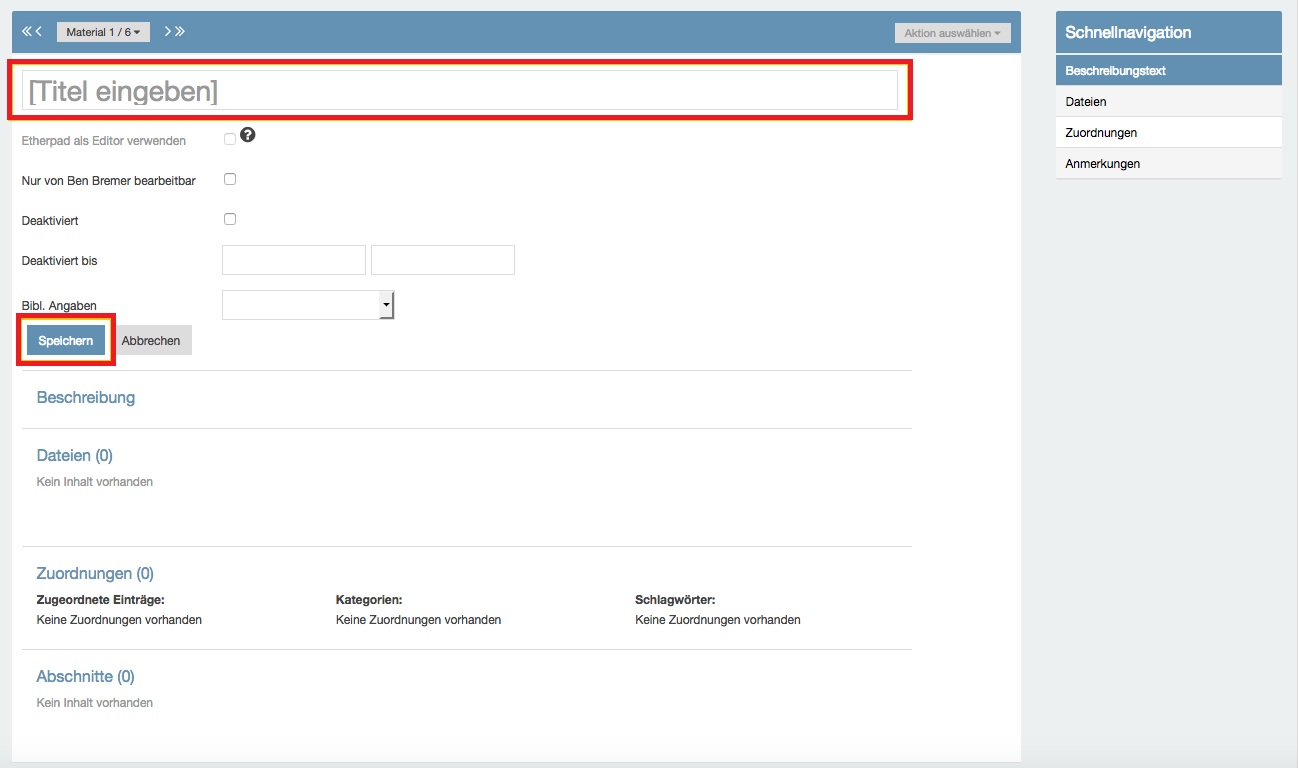
Name the entry ("Enter title") and click on "Save."
| Tip: You can add additional information to your entry by providing bibliographic details. To do this, select the appropriate entry from the "Bibliographic Details" drop-down menu and fill in the additional fields. |
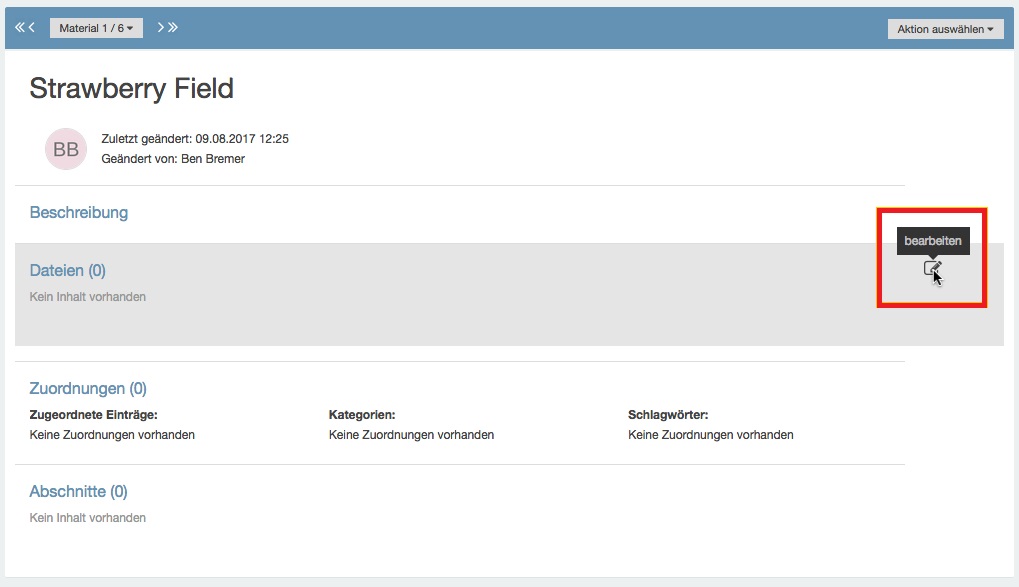
By clicking on the edit icon next to the respective section, you can enter a more detailed description if you wish, and if you click the icon in the "Files" section, you can upload files.
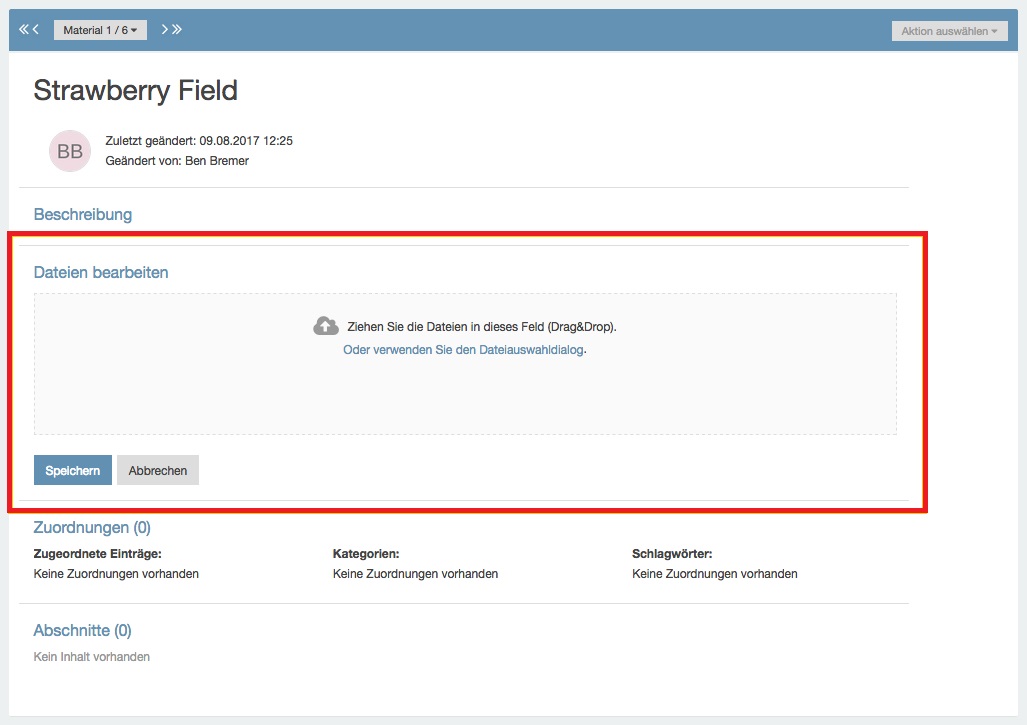
A file upload area will open, where you can upload files and attach them to the entry. Since CommSy version 9, you have the option to drag and drop files into the marked area to upload them, in addition to the classic file selection dialog. Multiple selection is also possible.
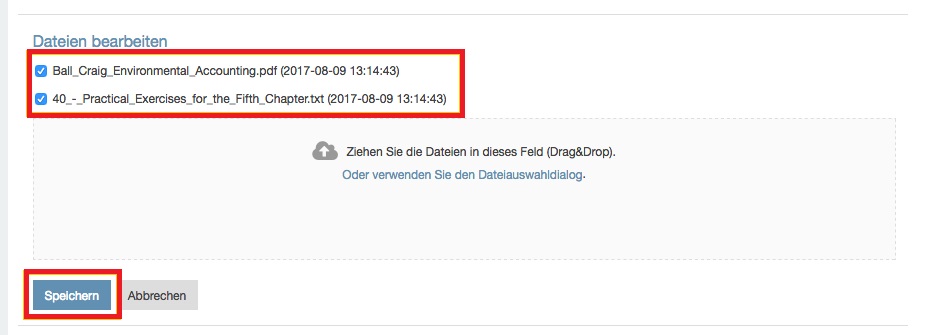
When the file(s) have been successfully added, the filename will be displayed with a checkmark. Repeat the previous step if you would like to upload additional files. If you add multiple files individually in this way, they will be displayed in alphabetical order, each with a checkmark. If you accidentally selected the wrong file or no longer want to upload a particular file, remove the checkmark by clicking on it. Files without a checkmark will not be uploaded or will be deleted during the save process. Click on "Save" to attach the files to the material entry.
| Tip: You can find out how to embed files and media directly into the text in the tutorial "Embedding Media.“ |
2. Access Rights & Deadlines
In the form for creating a new entry, the "Title" section includes the options "editable only by creator," "deactivated," and "deactivated until." When you click on one of the boxes, a checkmark will appear. By selecting this box, only you (and all moderators of the room) will be able to edit the entry. This way, you can prevent other participants from accidentally or intentionally editing, deleting, copying, etc., the entry. When this setting is activated, the option to edit an entry is grayed out for all non-moderators.
| Tip: To prevent your entries from being (accidentally) deleted, please select "editable only by creator" when creating an entry. This allows all participants to respond, but only you and the room moderation can edit or delete the entry. |
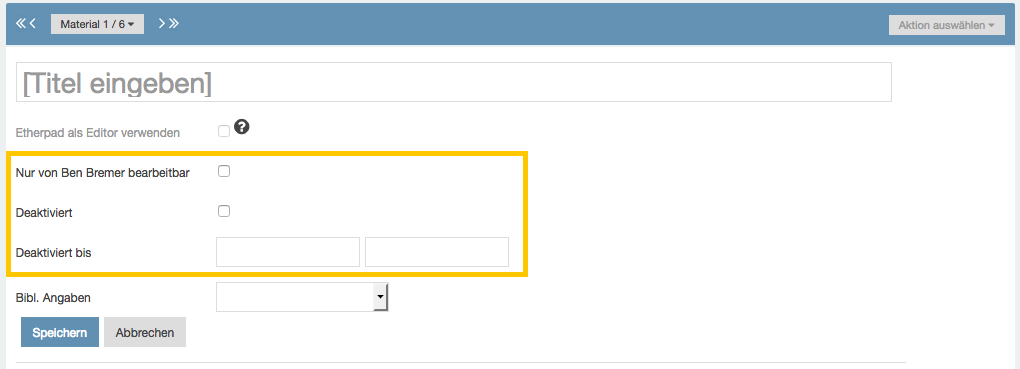
Select the second box "Deactivate," and then the entry will only be visible to you. It will be hidden from all other participants (including other moderators). This option can be used, for example, if you want to create an entry for preparation purposes and only make it accessible to other participants later. You can manually unlock the entry at a later time—just leave the fields next to "Deactivated until" empty (see Fig. 7).
If you enter a date and time in these fields, your entry will be automatically unlocked at the chosen time and displayed in the materials list for all room participants. You can manually enter the desired date and optionally a time, or select it by clicking on the desired date in the appearing calendar or time context menu.
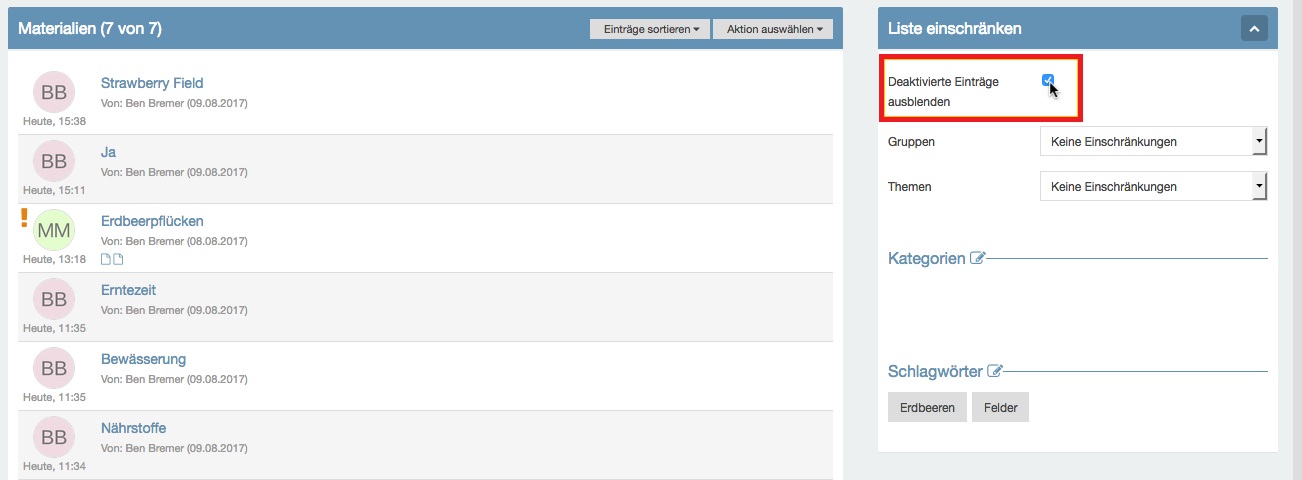
The hidden entry will initially not appear in the materials list, even for you. Click the checkbox next to "Hide deactivated entries" in the column to the right of the materials list to display the hidden entry you created.
3. Save New Version
When you edit one of your own entries or an entry by other participants, there is an option to save it as a new version. This allows you and other participants to access previous versions and track changes. To do this, simply click the "Create New Version" button (see Fig. 9) after making changes to the entry. The entry will then be automatically saved as a new version instead of overwriting the old entry.
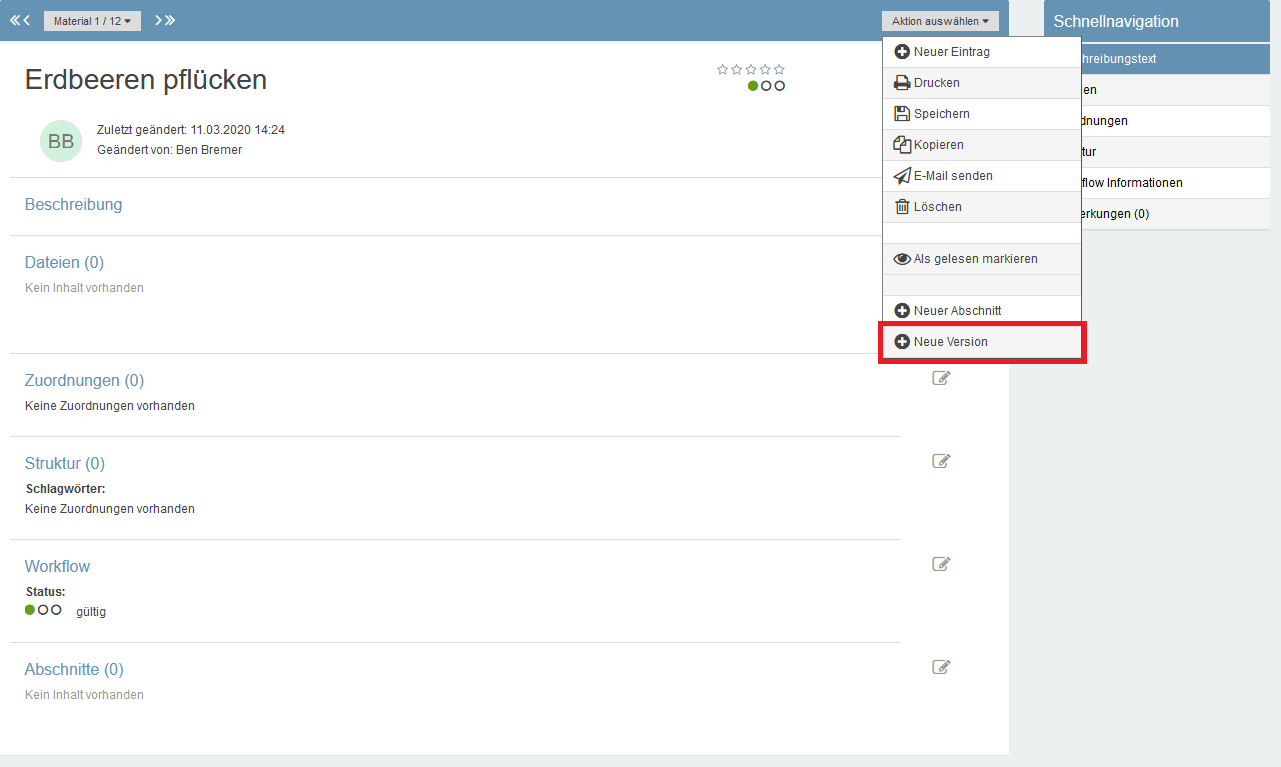
Above the entry, a timeline will appear with several document icons indicating how many versions of this entry exist. When you click on one of these icons, the corresponding version of the entry will open. The icon furthest to the left marks the original version, while the icon furthest to the right indicates the most recent version of the entry. When you hover over an icon with your mouse, the creation date and time of the respective version will be displayed (see Fig. 10).

4. Etherpad
Etherpad is a new editor in CommSy9 that allows for collaborative and simultaneous editing of texts in real-time. The authors are highlighted with different colors while writing. In the saved text, the colors do not appear, but they become visible again when the entry is opened for editing.
The Etherpad also includes a chat feature and a version history, allowing you to view and potentially restore older versions of the entry. The functions of the editor will be presented in more detail in this chapter.
Activating Etherpad: Etherpad can only be used in the materials section. When creating the material entry, a decision must be made initially whether to use Etherpad instead of the conventional editor. This setting cannot be changed afterwards.

Formatting: This editor offers significantly fewer formatting options than the classic editor (marked [1] in Fig. 12). So if you require more options beyond the main formatting choices (bold, italic, lists, etc.), it is better to use the conventional editor, which is set as the default.
| Tip: Once the collaborative phase is complete, you can copy the text and transfer it to an entry using the normal editor to make further formatting adjustments. |
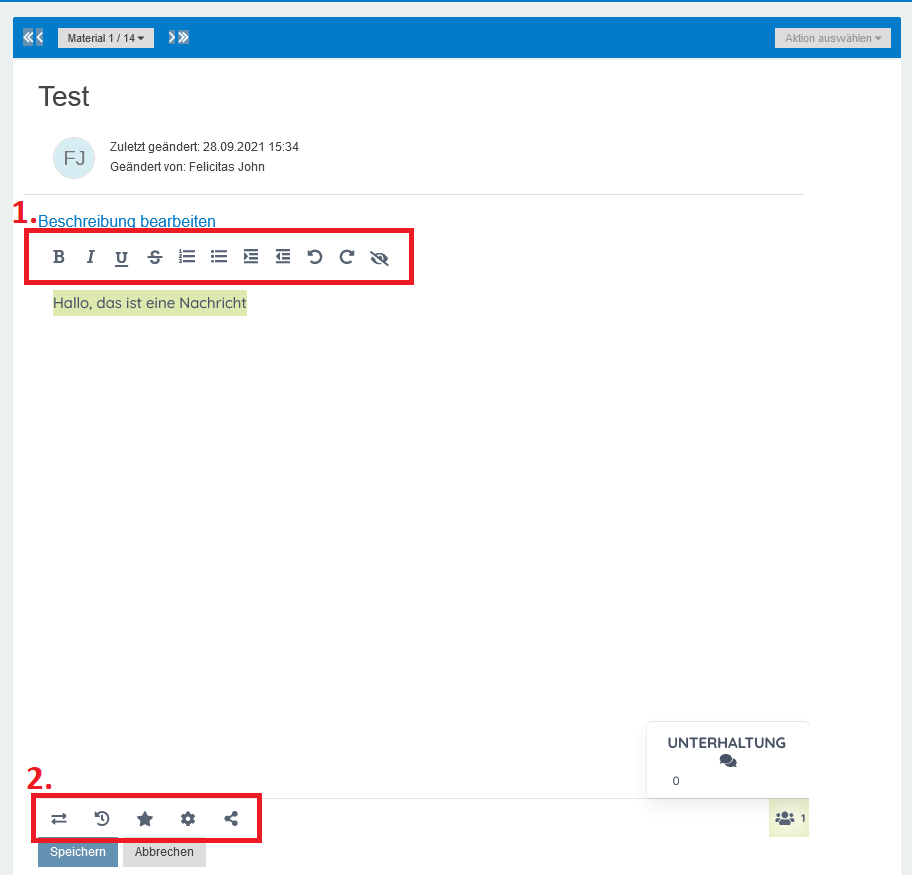
Author Colors: All authors automatically receive a color when they start writing in Etherpad. The color and display name can be changed (see Fig. 12 [2], far right). Through this menu, you can also see who is currently working on the text. In the saved entry, the colors do not appear, but they become visible again when the entry is opened for editing. You can also hide the author colors in the editor using the button "Reset Author Colors" (eye icon).
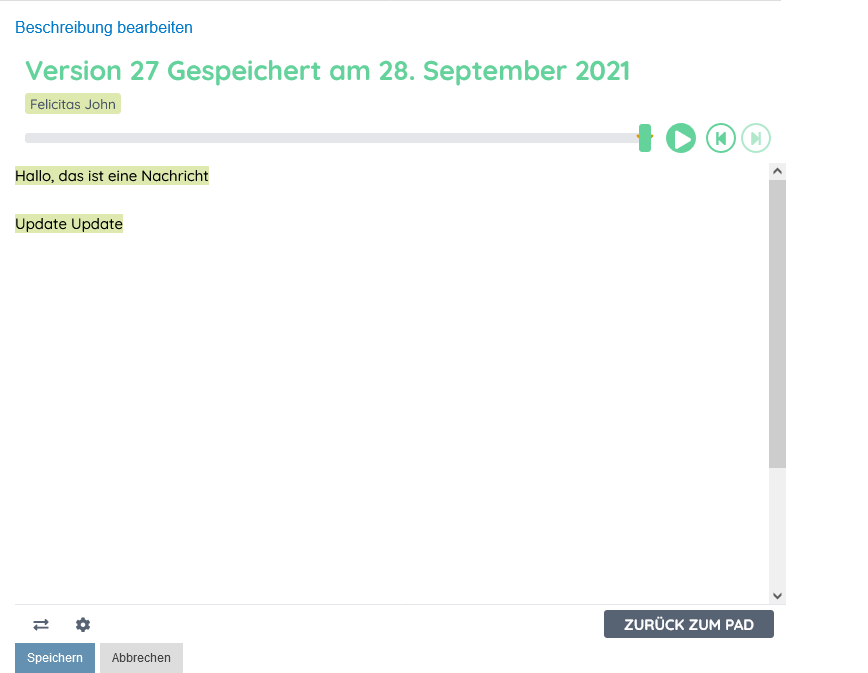
Version History: By clicking the "Edit History" button (the clock icon in Fig. 12 [2]), you can access the timeline where older versions of the entry are automatically stored. If you want to manually save a version, click on the "Save Version" button (the star icon in Fig. 12 [2]). These versions will appear in the version history (see Fig. 13) marked with a star. Within the timeline, you can navigate with your mouse; the oldest entries can be found all the way on the left. If you press the play button, all older versions will be played back chronologically, and you can also skip forward or backward. The "Back to Pad" button takes you back to the editor.
Chat: When writing simultaneously in Etherpad, the integrated chat can be used to make arrangements in parallel. What is discussed here will not appear later in the version history. The chat is located at the bottom right of the editor. However, you can also set in the editor's settings menu that the chat is always displayed in an expanded view.
5. Download Material Entries
To download material entries, including documents (e.g., PDF, Word, JPEG, etc.), go to the "Materials" section and follow these steps:
1. Under "Select Action" > "Download."
2. Click on the material entry you wish to download.
3. Choose "Perform Action."
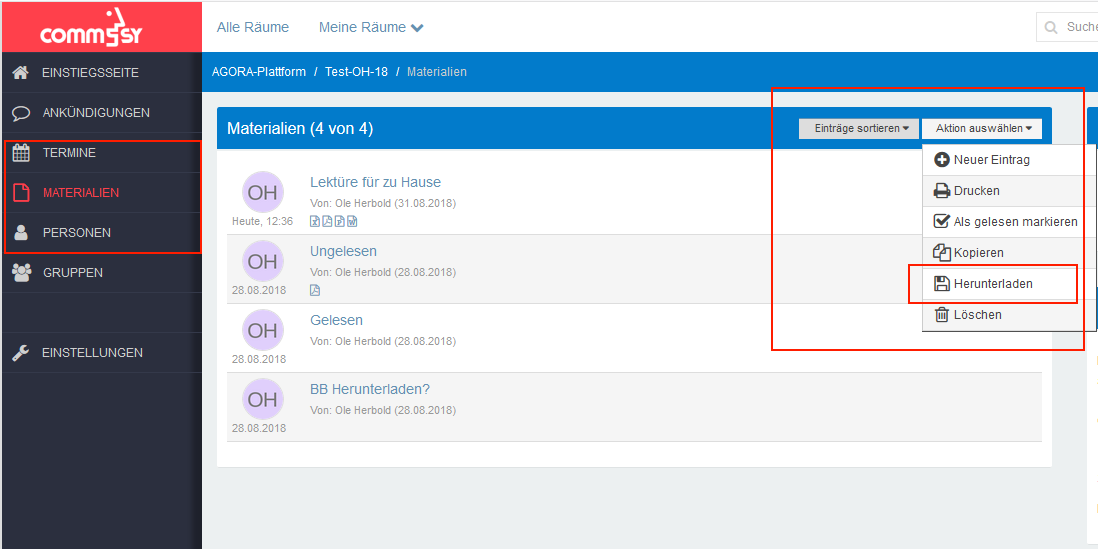
In the "Tasks" and "Discussions" sections, you can also download entries.
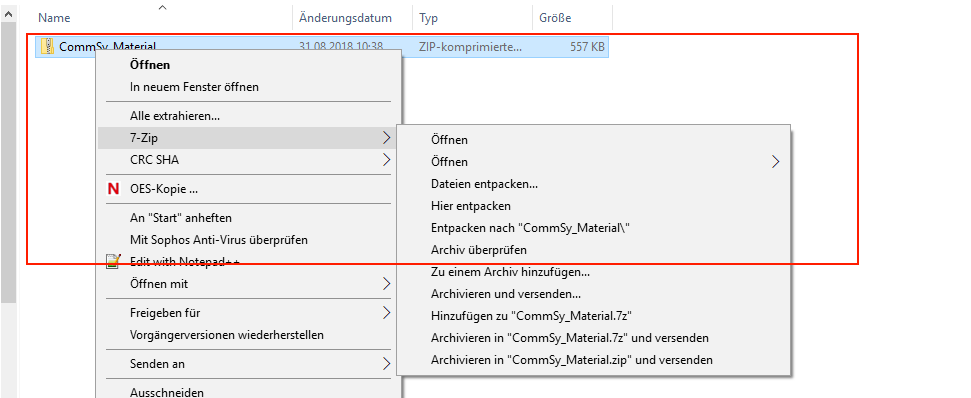
| Note: The extraction works only with 7-Zip or other programs that should typically be pre-installed on your computer. |
