Embedding Media
In your work with CommSy, you have the opportunity to enhance your entries with various types of media to make them more engaging and informative. You can embed different media such as links, images, videos, or music in all sections where you can create your own entries. “Embedding” means that the media will appear as such within the entry.
For example, if you embed an image file in an entry, the image will appear immediately (along with the rest of the entry's content) when the entry is accessed (see Fig. 1). Users do not need to download the corresponding file to view the image.
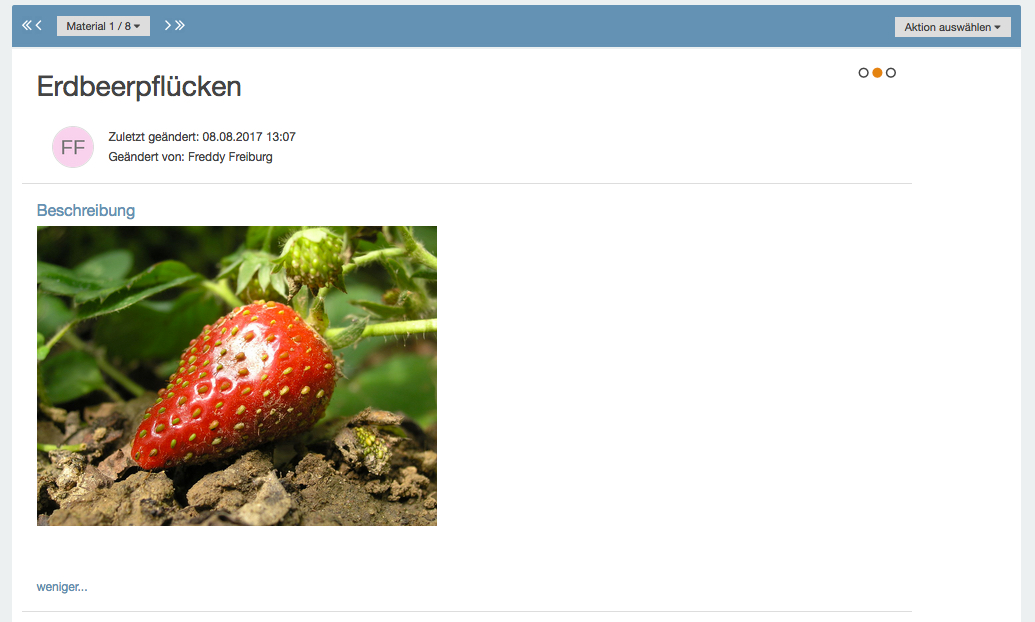
| Note: Due to the „responsive design“ of CommSy9, the complete descriptive content of an entry is not automatically displayed, which is why most images and videos appear "cut off." By clicking on "more...," the full content will be shown—clicking on "less..." will collapse it again. |
The following explains the integration of images and videos; the procedure for incorporating music is quite similar to that of video integration. Therefore, if you would like to embed a music file, please refer to the chapter on embedding video.
1. Embedding Images
To embed an image, go to the editing menu of the description. You can access this by hovering your mouse over the area to the right of the description field (Fig. 2).

To embed an image file into the description text, click on "Insert Image" in the editor (Fig. 3).

A dialog box will open. You now have two options to choose from: On one hand, you can embed images that are saved as files on your computer. On the other hand, you can also embed images that you want to source from the internet.
Embedding images from your computer: To insert images saved on your computer, click on "Browse..." under "Upload New File" (Fig. 4).
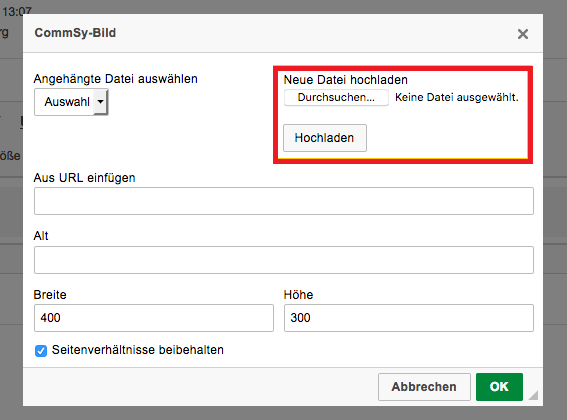
A selection dialog will open, from which you can choose the desired file. You can embed images in all common file formats (jpg, jpeg, gif, bmp, png). Once you have found the desired file, click on "Open," and then on "Upload." The field "Insert from URL" will be automatically filled in. Additionally, you have the option to provide an alternative description for the attached file under "Alt" and to determine the size of the embedded image. It is advisable to keep the checkbox for "Maintain Aspect Ratio" checked to avoid distortion of the image. To insert the image, click on "OK" (Fig. 5).
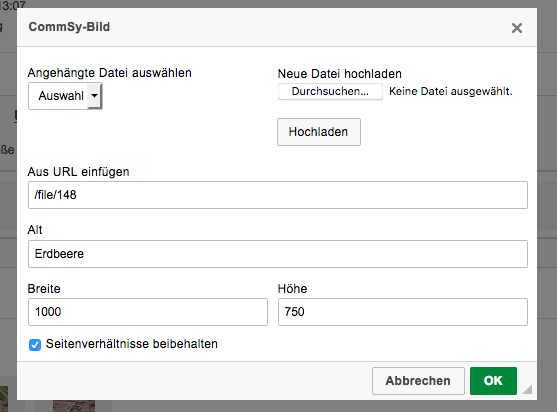
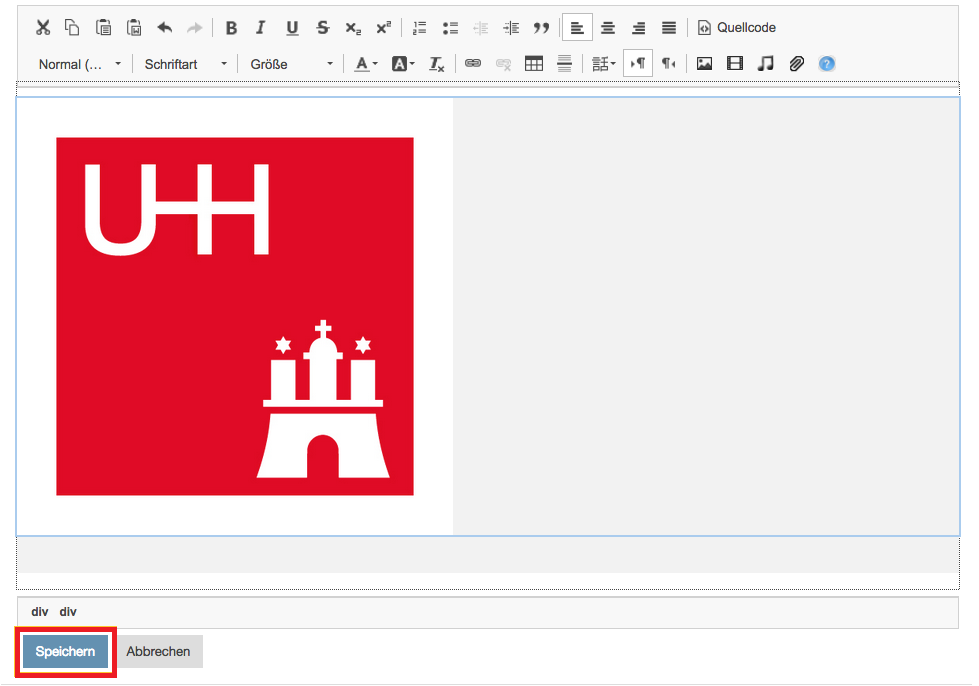
To complete the editing, click on "Save" (Fig. 6). The image is now embedded in the description.

Embedding images from the internet: To embed an image from the internet, enter the link to the image under "Insert from URL." Make sure that the link includes a file extension (e.g., .jpg, .png, etc.). Here, you can also enter an alt text and determine the size ratio (Fig. 7).
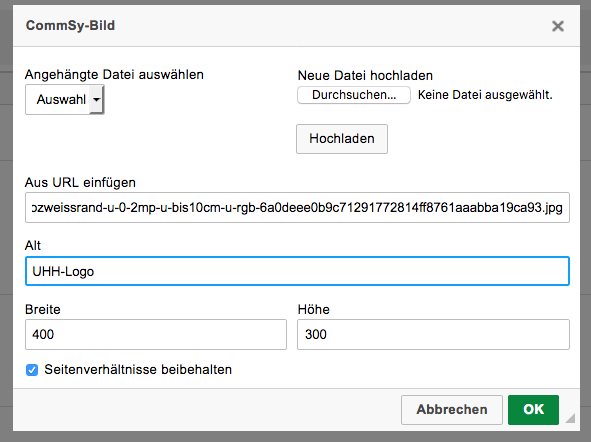
The desired image file will now be inserted into the description text. To complete the editing, click on "Save" here as well (Fig. 8).
2. Embedding Videos
When embedding videos, you also have the option to either upload your own files from your computer or link to videos from the internet. To do this, open the editing menu of the description. You can access this by hovering your mouse over the area to the right of the description field (Fig. 9).

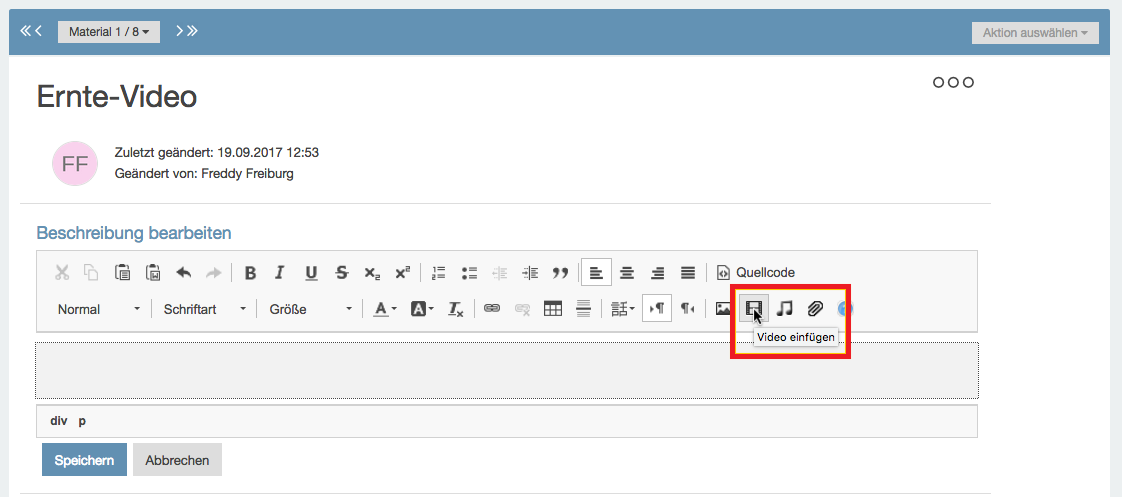
Click on the option "Insert Video" in the editing menu (Fig. 10).
You now have two options: You can either upload a video saved on your computer or embed a video from the internet (e.g., from Lecture2Go, YouTube, etc.).
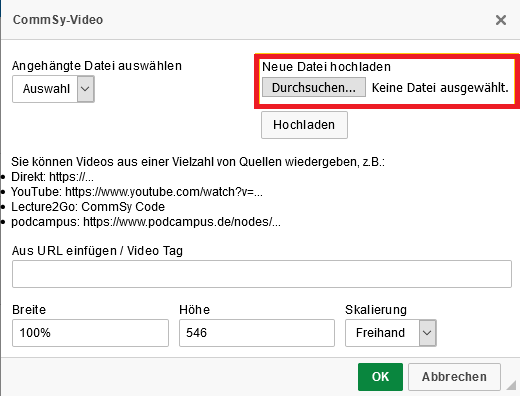
Embedding videos from your computer: To embed videos directly from your computer, select the option "Browse..." in the upper section of the menu that appears to access files on your computer (Fig. 11).
Select the desired file and confirm your choice. By clicking on "Upload," your video will be prepared. The bar labeled "Insert from URL / Video Tag" will be automatically populated.
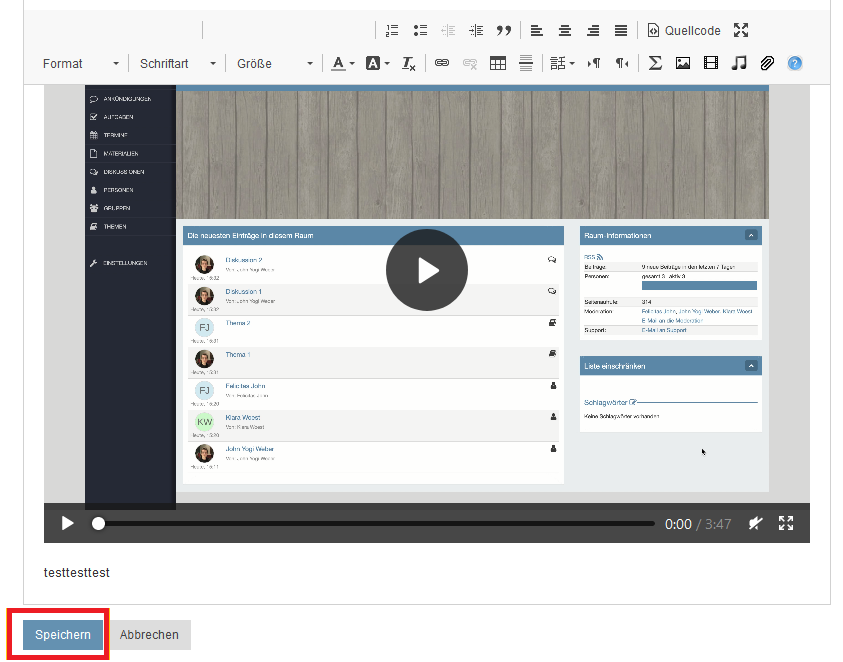
Then confirm by clicking "OK." The video is now embedded in the editing field. With a click on "Save," the video will be inserted in the desired location in the description (Fig. 12).
Embedding videos from the internet: Due to the upload limit of 150MB for individual files, it is advisable to embed videos that have already been uploaded to other platforms rather than uploading them directly to CommSy. You also have several options here:
1. Embed videos by providing the direct link to the video, e.g., a direct link to a video on your personal website—make sure that the link includes a file extension such as ".mp4."
2. Provide a YouTube link (in the format "https://www.youtube.com/@unihamburg").
3. Embed a so-called "HTML5 code" (e.g., from Lecture2Go).
In this tutorial, the embedding will be demonstrated using a YouTube video:
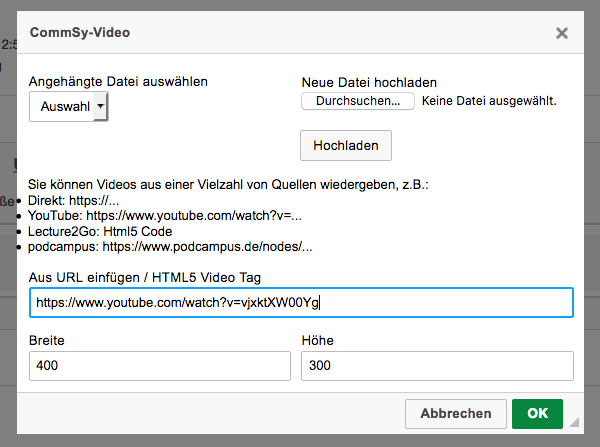
Simply enter the YouTube link in the specified format (see above) under "URL." As with embedding images, you can also determine the size of the video here. To prevent distortion, it is advisable to keep the checkbox for "Maintain Aspect Ratio" checked. Then click on "OK" (Fig. 13).
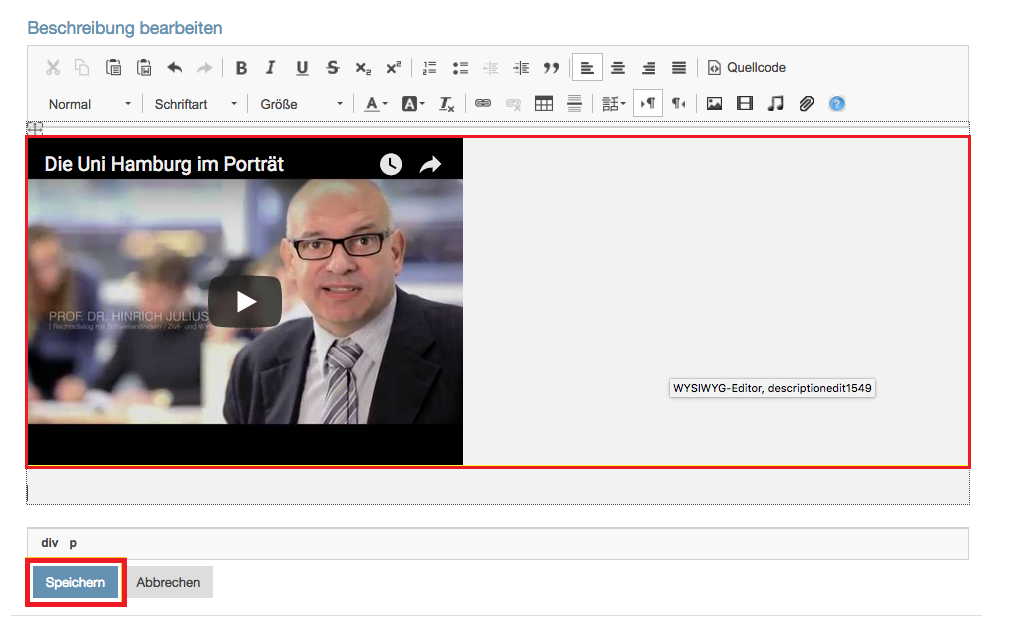
To complete the editing, click on "Save." The video will now be inserted at the desired location in the description (Fig. 14).
3. Embedding Links
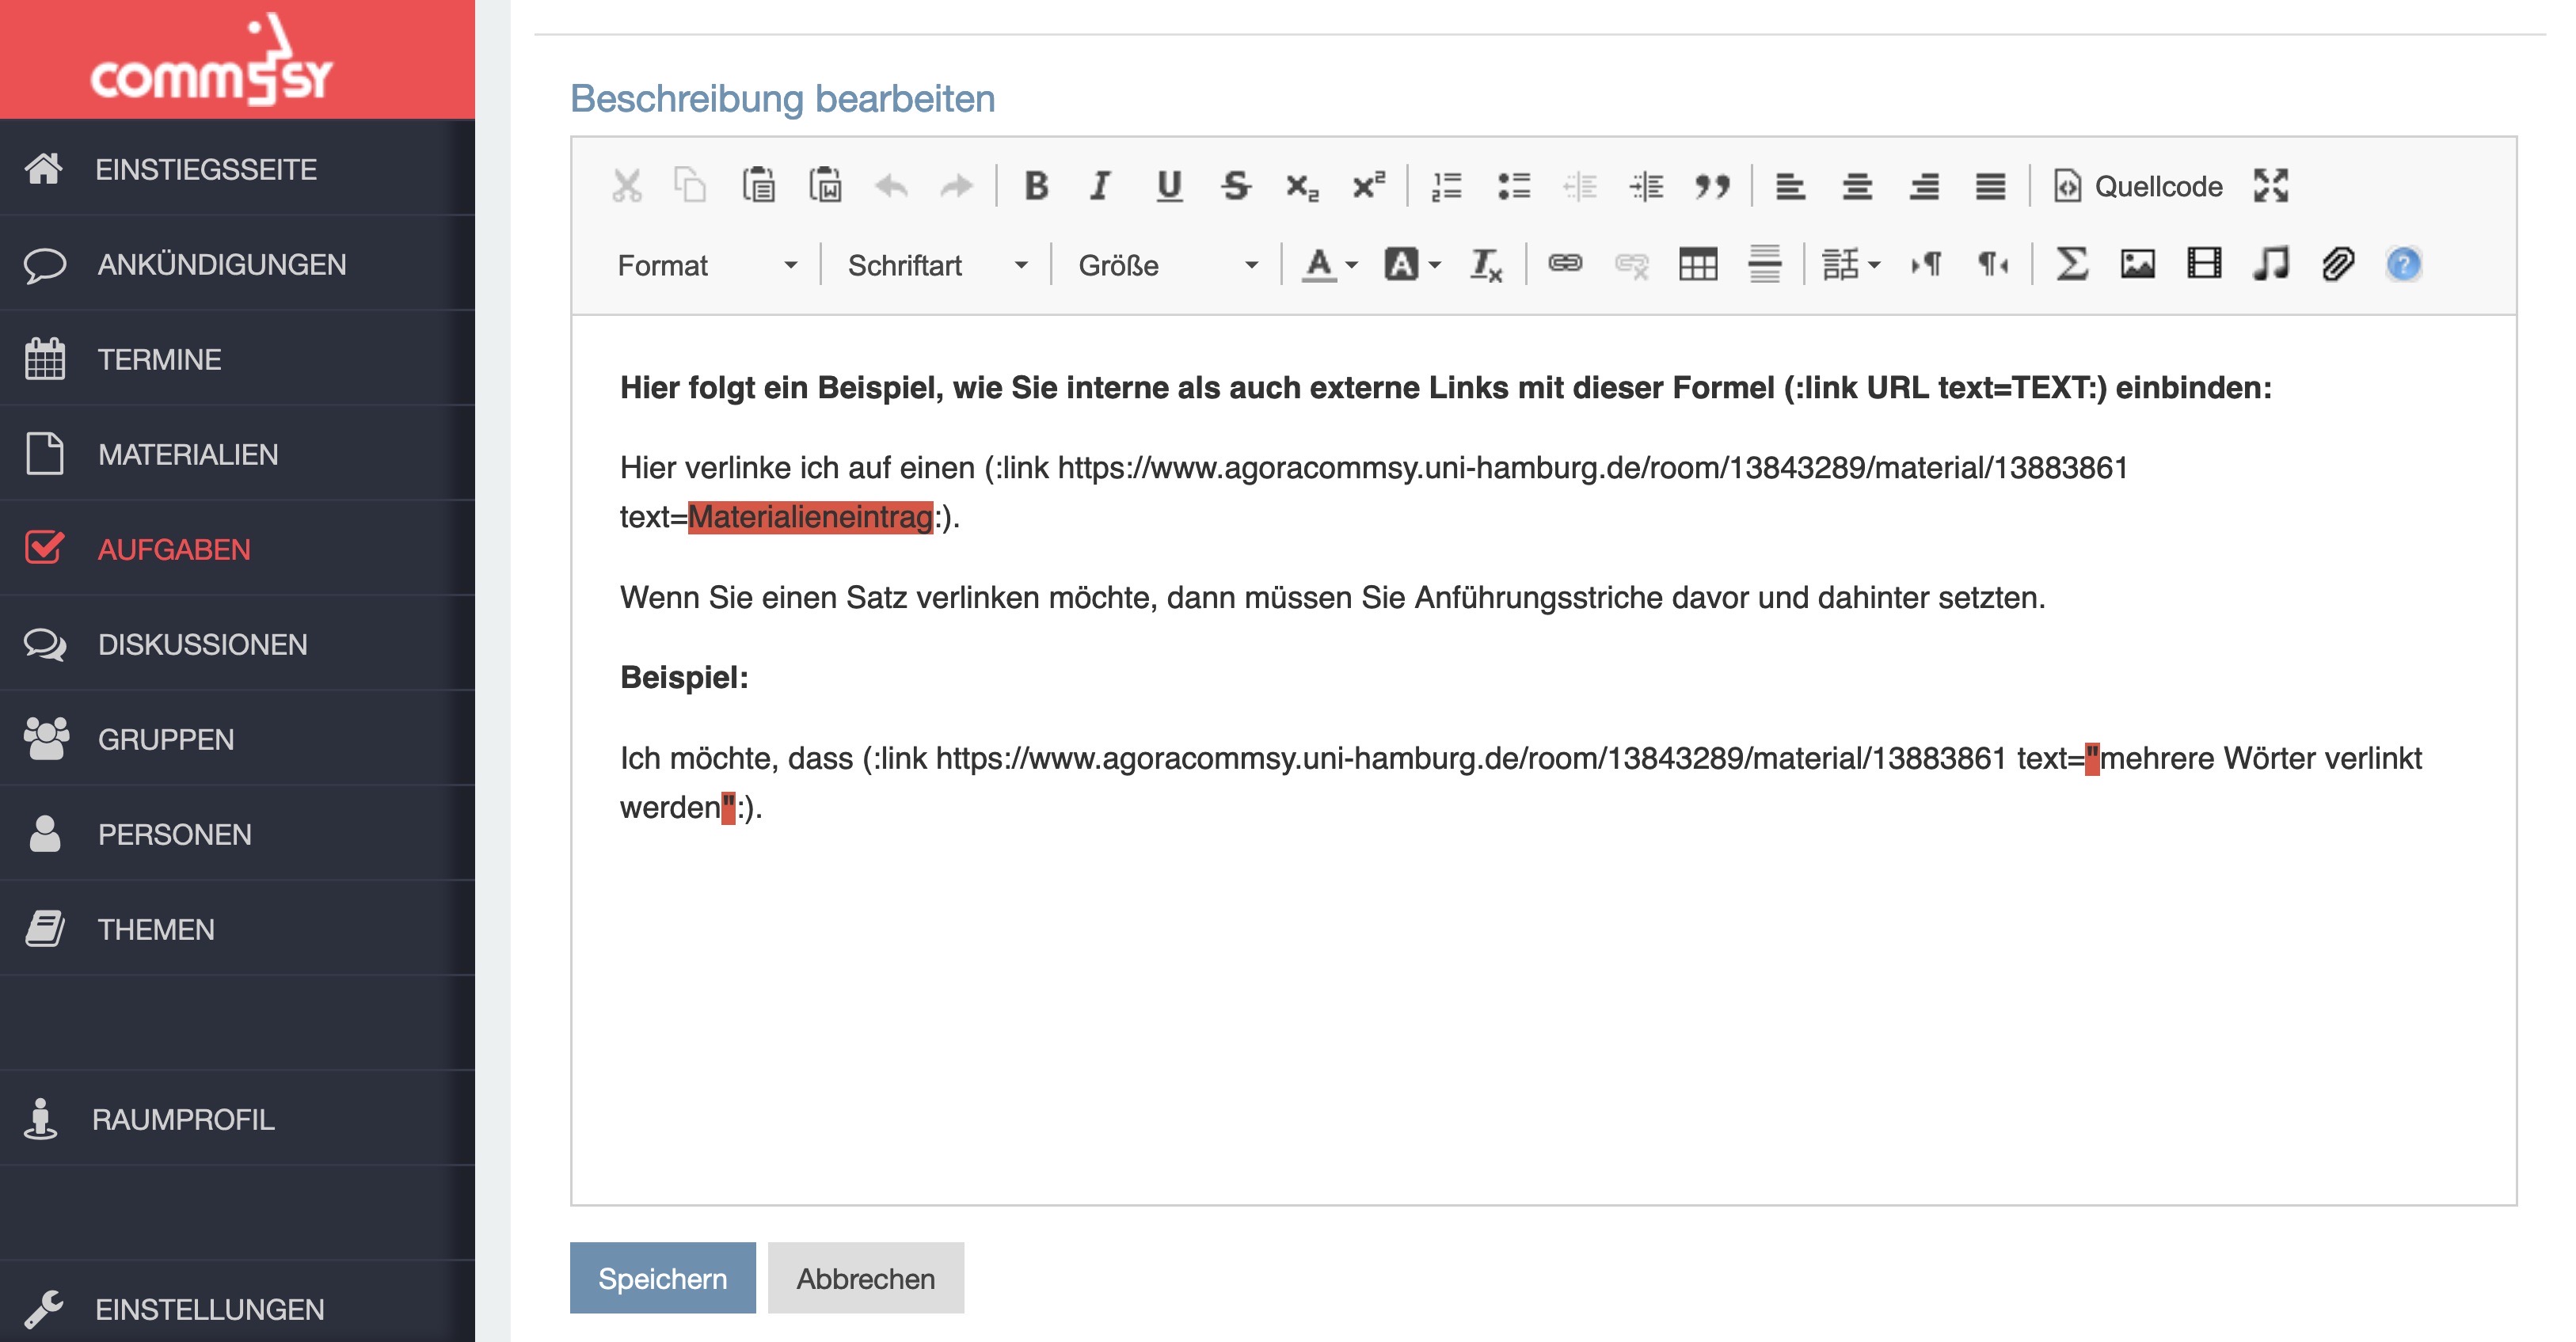
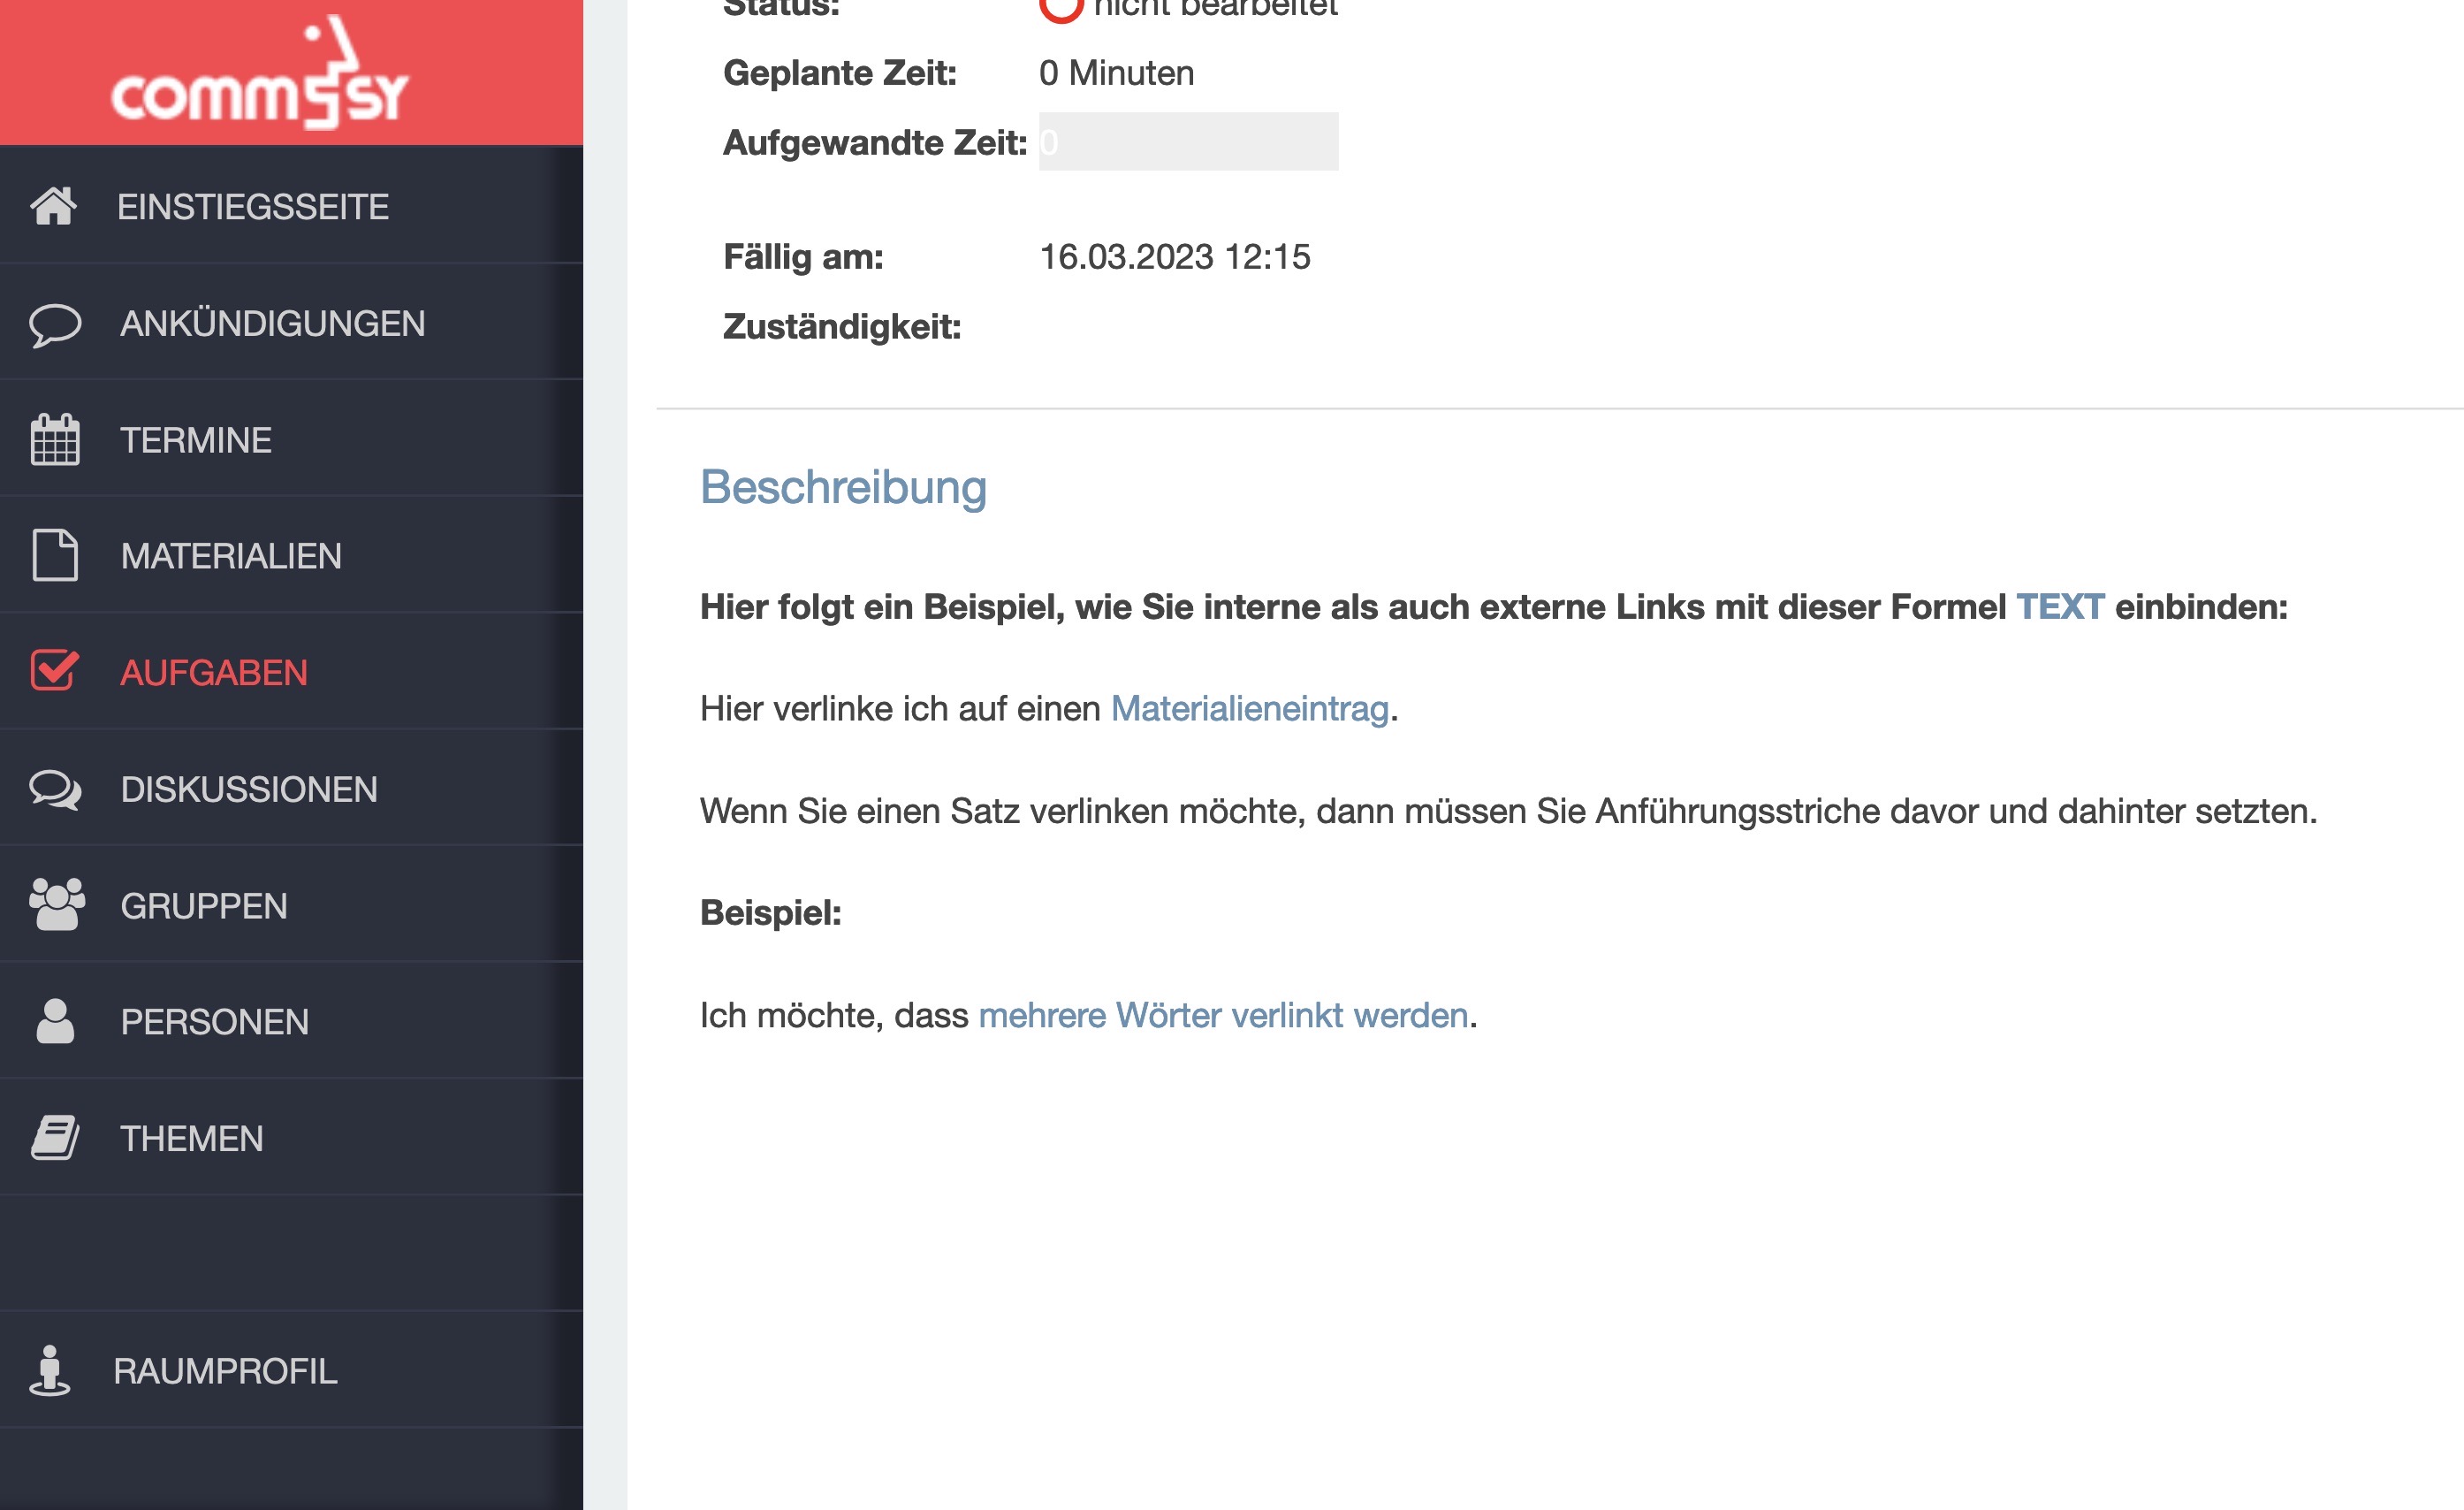
The function of a link is to refer to another website, thus "linking" it. In CommSy, there are generally two types of links that you can embed: normal hyperlinks that refer to any website and links to other CommSy entries that can be embedded with their own command.
Hyperlink: (:link TARGET text=TEXT:) Replace "TARGET" in this code with the address of the website you want to refer to. For "TEXT," enter the text that should be displayed as the link.
Link to another CommSy entry in the same space:
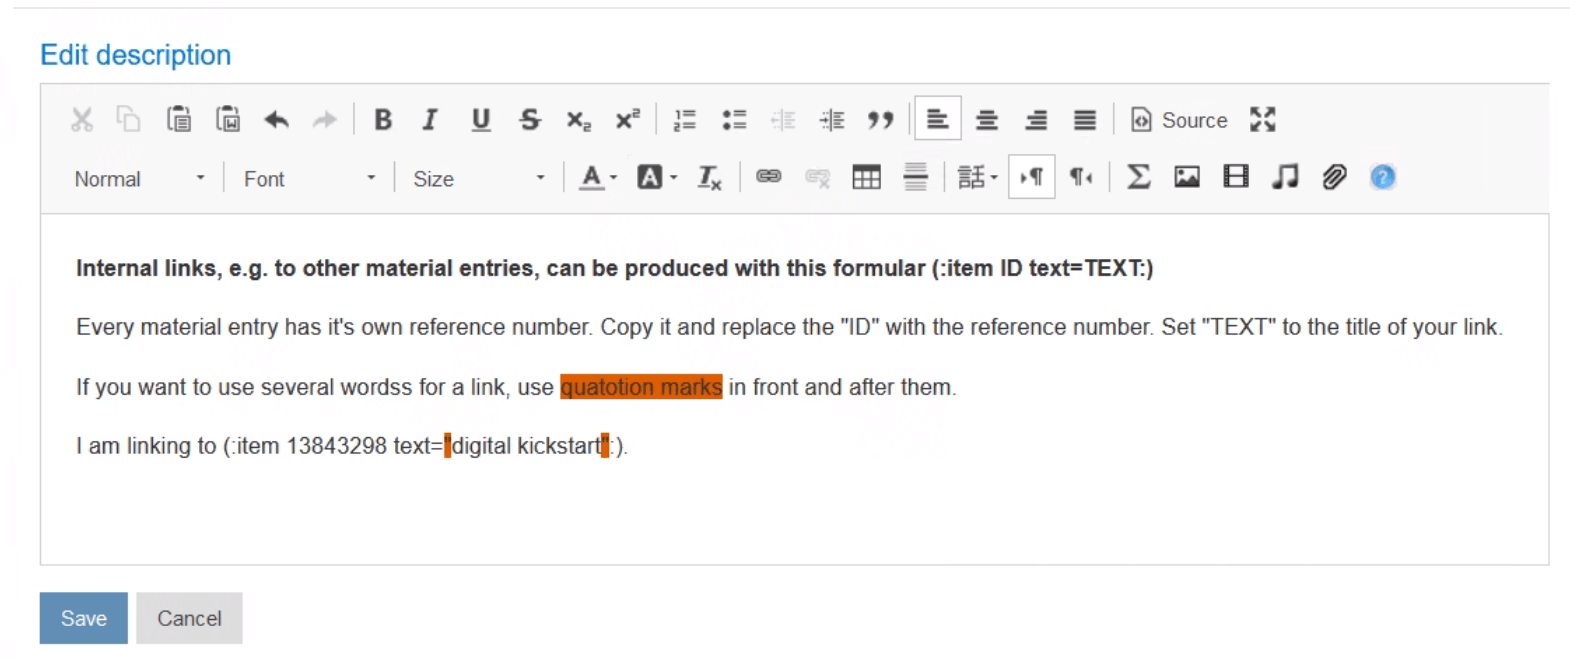
You can internally link to another entry in the description text of an entry. To do this, insert the so-called reference number into the formula as follows:
Step 1: Navigate to the entry you want to link to and click on "more..." next to the title (Fig. 17).

Step 2: Copy the reference number (Fig. 18).

Step 3: Use the formula "(:item ID text=TEXT)" (Fig. 19).
Step 4: Save your description.

